GPS track (partial – lost reception on the climb to P3)
~10 miles
~5100′ gain
It’s November – the gloom has finally arrived, and temps are starting to drop in the mountains. I had run many well-traveled peaks in September and October and I wanted to try something off the beaten track before snow forces a switch to skiing instead of running.
After weighing a number of considerations (safety on a solo run, exposure with wet rock, driving time, familiarity with the area) I ended up selecting Putrid Pete’s Peak as an objective and figured I’d improvise a way down once I made my way back into terrain I have seen before. Arriving at the Ira Spring Trailhead along the customarily potholed road, the temperature lingered at around 37F. This was going to be a chilly day. It was also raining, so I was concerned about temperature management, especially if I got injured and took longer than expected to make my way out or wait for rescue. I threw in an extra puffy jacket into my running pack just to be safe.
Route map (black is off trail running and scrambling, red is established forest service trails)
I started off running and kept going straight instead of taking the first marked switchback (the Ira Spring trail). These Summitpost instructions got me started on the faint use trail to the summit of P3:
“Begin at the Ira Spring / Mason Lake trail. Follow the trail 1/10 of a mile to the first switchback. Instead of turning to the right, continue forward over the sticks meant to block the way onto a faint path which quickly becomes well pronounced. After 1/3 of mile the trail begins switching back as it climbs steeply along the mellow ridge leading up towards the east summit.”
Much of the lower half of the route was sort of brushy – with the recent rain and dew, I was totally soaked to the skin from brushing against all the vegetation. It was going to be a long, chilly day.
From there, the route steepens considerably and ascends virtually direct to the summit. The last ~30′ to the summit block is low third-class scrambling which was quite secure. At the top there is a very steep dropoff to the north and a waterproof canister for the summit register.
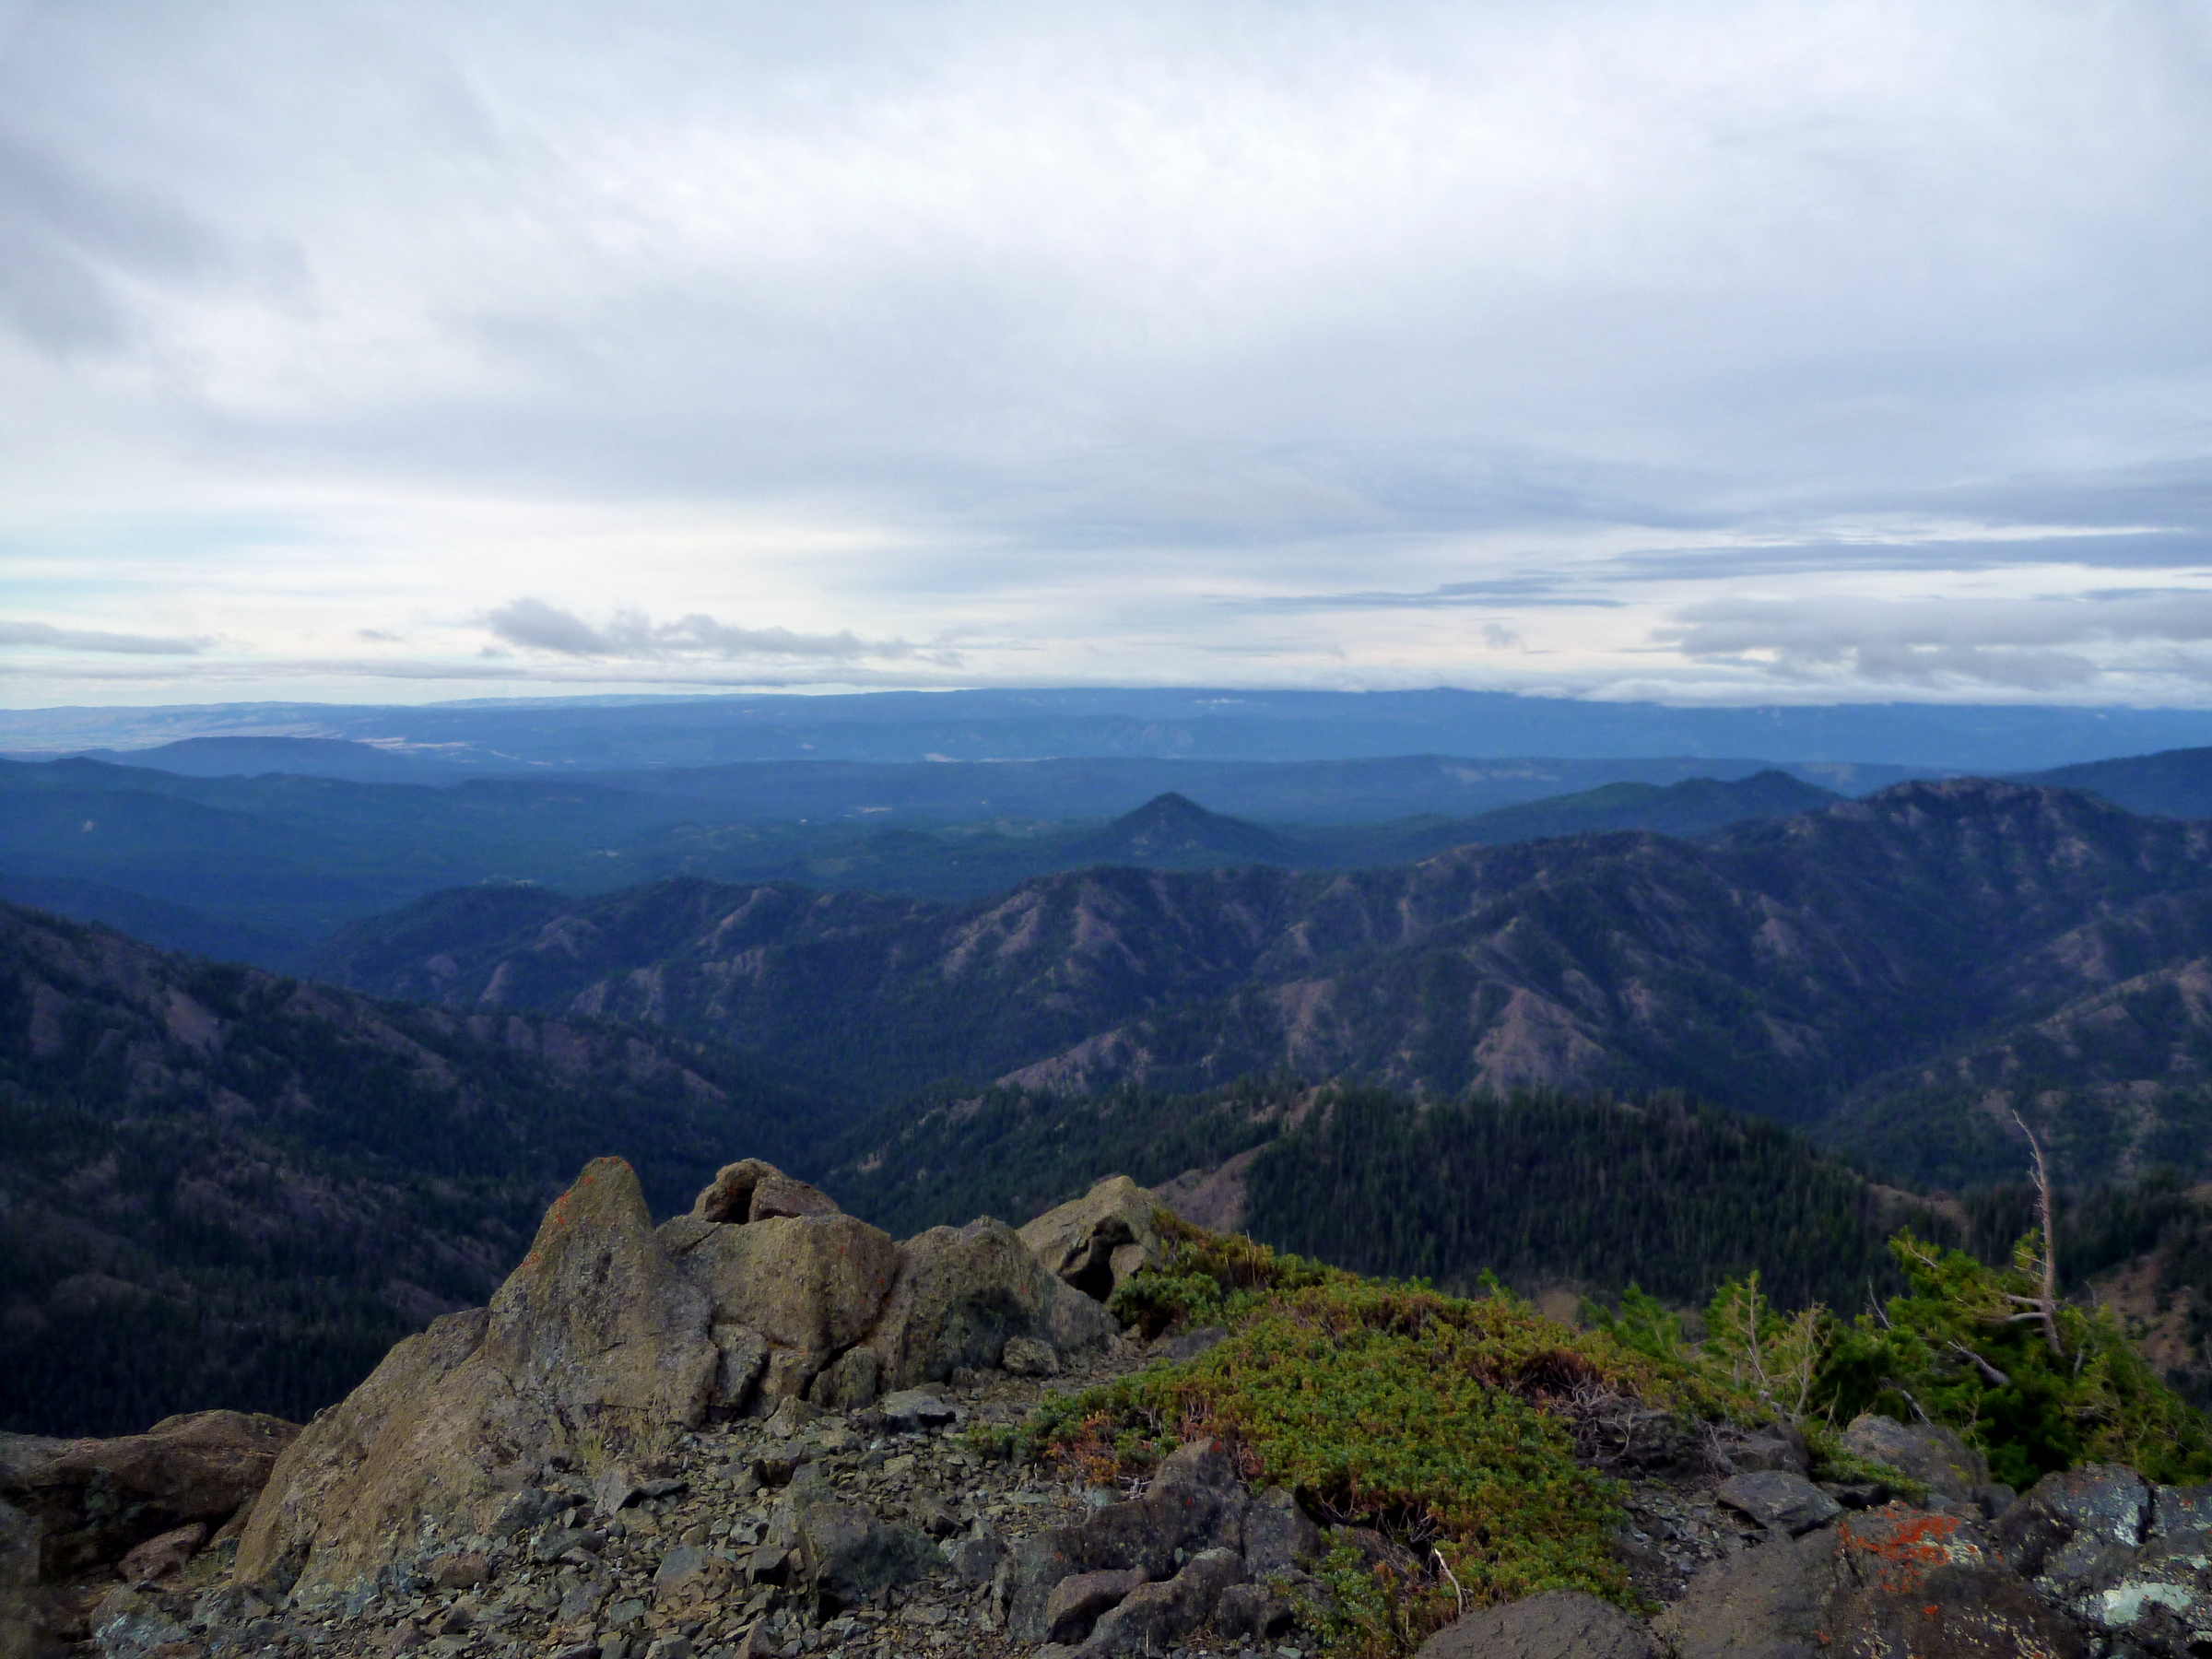
The visibility was… not great
P3 summit view (not sure which direction – does it matter?)
The next portion of the route was a bit of an unknown quantity – I just knew I needed to follow the ridge ESE to Mt. Defiance. The ground here was pretty rugged for the first half of the traverse, with potential for dangerous falls in both directions, so I proceeded with a lot of caution.
Wet, sloping rock on the P3 – Defiance traverse
This section of the route had no identifiable trails so I generally tried to stick right to the crest of the ridge and the whole thing went at Class 2 with a bit of minor exposure in some points. My biggest challenge was simply the temperature. I was dressed for trail running with minimal insulation, and the temperature was probably 33F or so. After I stopped climbing, my aerobic output didn’t help keep me warm and I soon started to shiver. Continue reading Defiance Ridge Run→
On this cloudy day, I set out to get my blood pumping with a mountain run (or two). I saw Silver Peak as a good candidate for views and easy access on Summitpost, and noted that the short Mount Catherine trail is nearby. They’re both located near the Hyak ski area off of FR 9070 in the Snoqualmie National Forest.
About 4.5 miles in, I came to four or five vehicles parked by the side of the road and a trail. I parked here and started following the trail, but got pretty confused – it was gaining elevation much faster than I had anticipated for Silver Peak, and heading in the wrong direction. A quick check of my GPS app revealed I was actually climbing Mount Catherine instead. No matter, I pushed ahead and summited the 5052′ peak anyway. At only 1.5 miles one way, it took me just 23 minutes from car to summit at my decidedly lackadaisical trail “running” speed (more like a power walk given the steepness) for around 1200 feet of elevation gain. This is a good peak for those lacking the endurance for a more stout vertical gain like Mt. Si. And the views are actually pretty outstanding. GPS log here
Mt. Catherine summit
After a quick descent, I moved my car another 1/4 mile down the road and found the Pacific Crest trailhead at Windy Pass. This is what I had originally been looking for. I headed in the direction of Stampede Pass on the PCT. GPS track here
Windy Pass
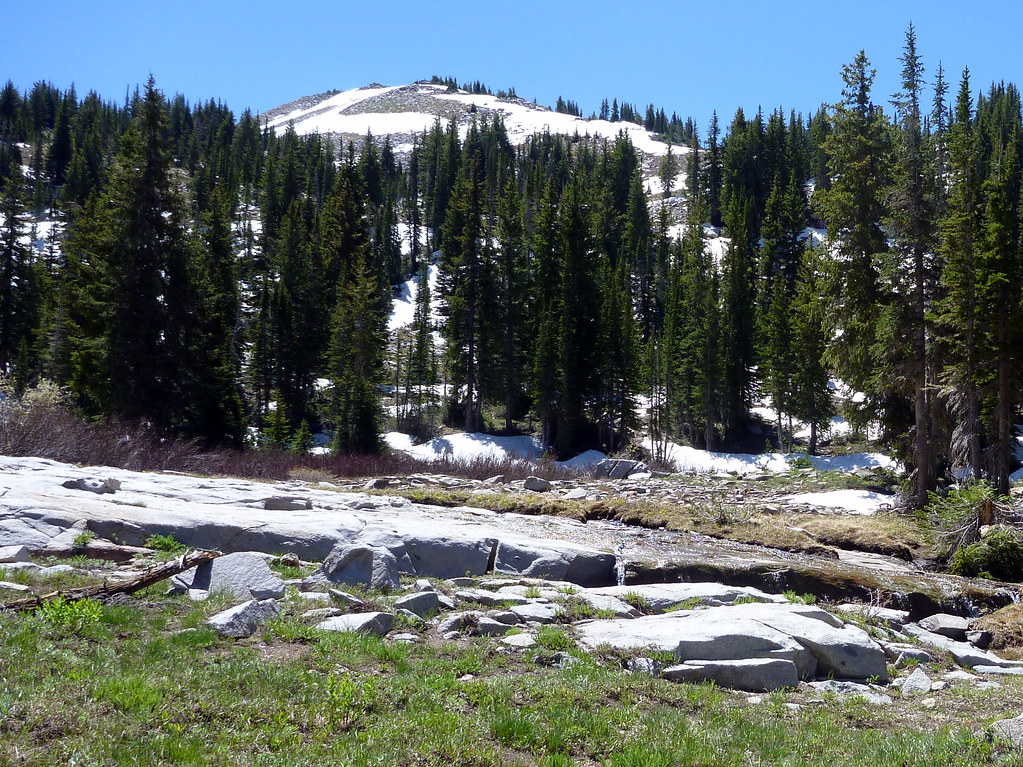
The trail is just beautiful, winding through conifer groves, talus slopes, and numerous creeks, although the surface is quite muddy right now. At exactly Mile 1.7 the turnoff to Silver Peak via an unofficial but fairly clear trail goes to the right, splitting off from the PCT at a spot marked with visible cairns. After gaining several hundred more feet, I reached a saddle between Silver Peak and its neighbor to the south, Tinkham Peak and headed to the right. Continue reading Silver Peak and Mount Catherine→
This labor day weekend called for clouds and showers all over the Puget Sound. Lacking a partner to tackle the remote peaks of the Pasayten Wilderness like I had originally hoped, I opted for a safer, less remote hike through the mountains of the Teanaway.
Situated north of the city of Cle Elum, east of the Cascade Crest, the Teanaway River watershed is protected by the rain shadow of the range to the west. This means that it has consistently better weather than other areas of the Central Cascades. It is full of great non-technical scrambling peaks. I’ve visited this area several times before and it’s one of my favorite areas in the state.
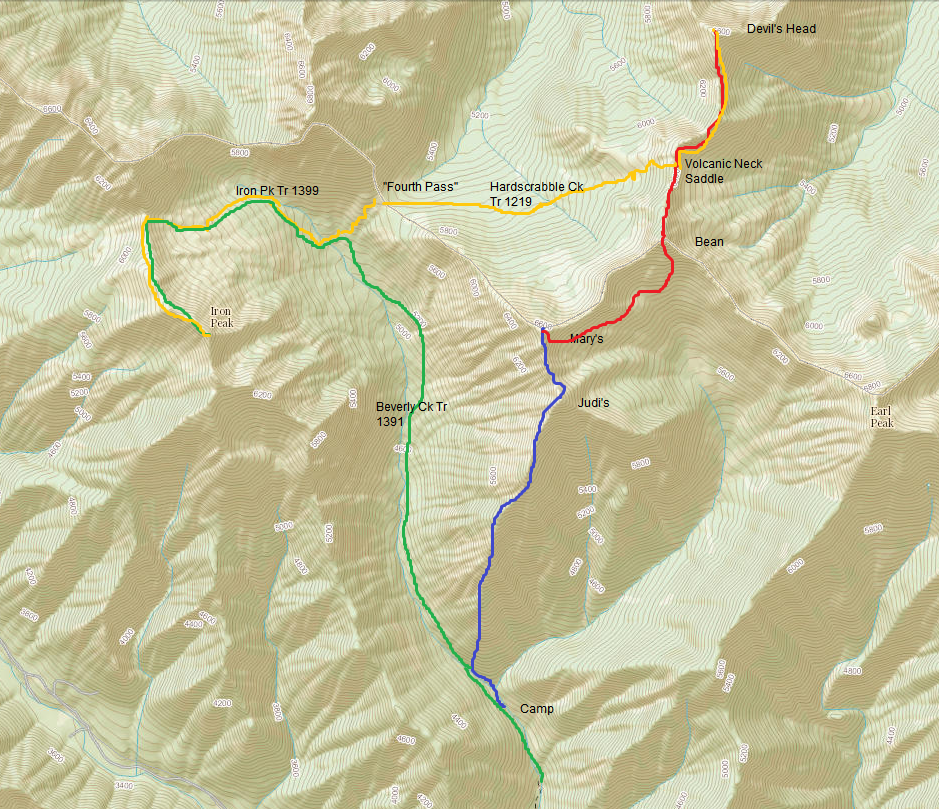
My plan was to camp overnight on Friday and do a mostly off-trail loop combining as many peaks as I could in a one day push. Traveling alone, I wanted to avoid anything with much exposure of difficult scrambling. My list included Judi’s Peak, Mary’s Peak, Bean Peak, Devil’s Head, Bill’s Peak, Teanaway Peak, and Iron Peak, although I figured I wouldn’t get to all of those. Here’s a map of the trip I actually completed:
The whole loop
~5500′ gain
~8-10 miles
5 “named” peaks
I walked in the night before and found a campsite about a half mile from the car, just prior to the Bean Creek turnoff. I should note that the Beverly Creek trailhead is accessible by a pretty rough road – I engaged my AWD system in a couple of spots. I was fine in my CRV (fake SUV) but those with Priuses should probably consider whether a couple of nasty spots are doable or not.
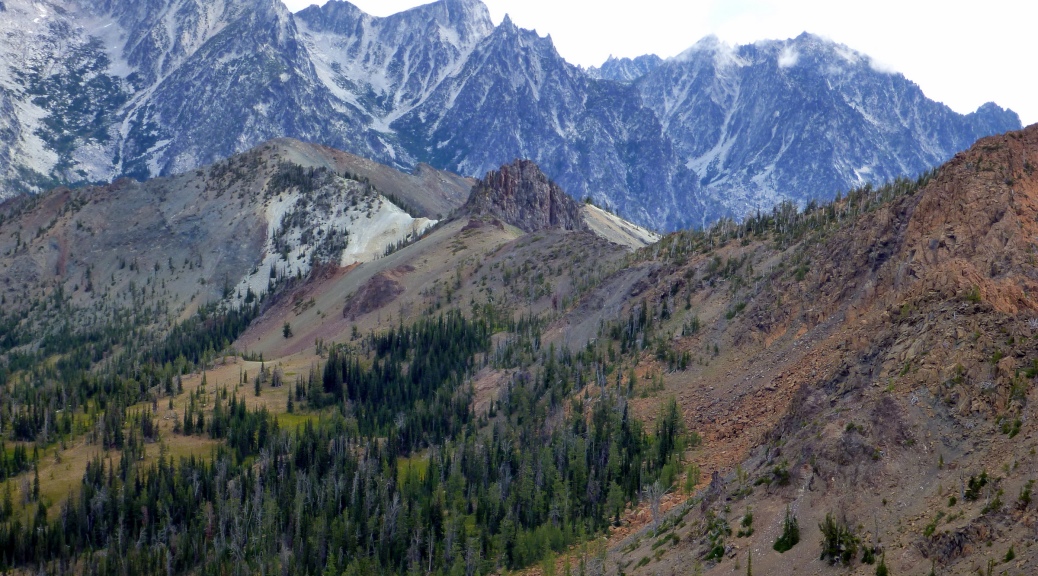
Judi’s and Mary’s Peaks
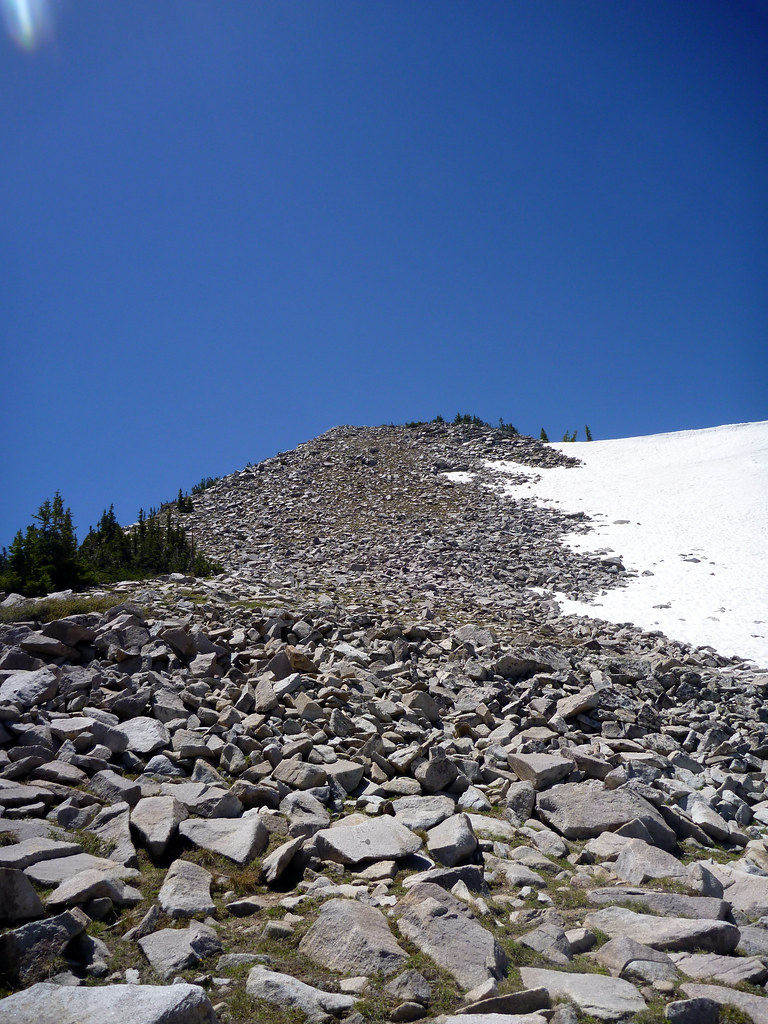
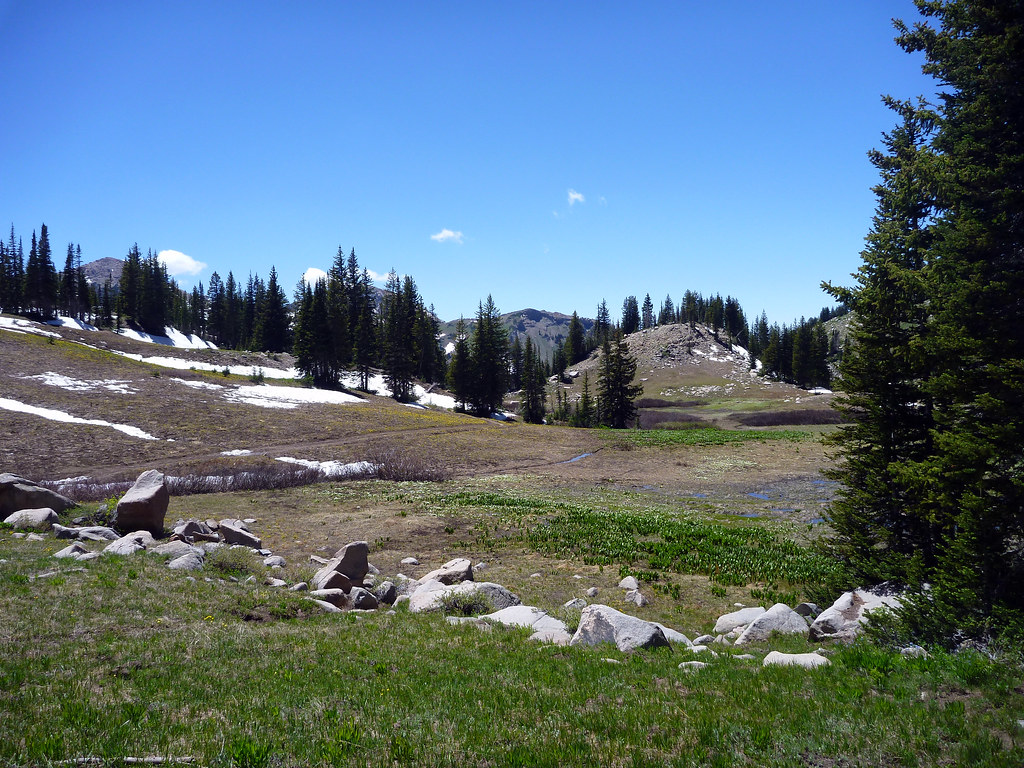
My day started out with these two minor peaks, anchoring the western border of the Bean Creek basin. I left camp, crossed Bean Creek, and almost immediately left the trail and proceeded straight up the fairly open southwest ridge of Judi’s Peak.
Easy travel
Routefinding here consisted of the “just go up” strategy. I tried to stick to the top of the ridge but dropped off to either side in a few places to avoid some scramble steps (in the interest of being conservative on a solo hike).
The Beatout
14 miles
5700+’ gain
12 hours car-to-car
Class 3
The Beatout is a Wasatch Mountain Club classic ridge traverse – known for being one of the longest, toughest hikes typically done in the Wasatch.
I started in Red Pine with a WMC group at around 7:20 AM on Saturday. We made decent time to the lake (~1 hr) and then proceeded up the headwall to Pfeifferhorn ridge.
Red Pine Lake
At this point, I took a slightly higher line than the use trail and bagged Little Pfeifferhorn. Good views from here with little effort.
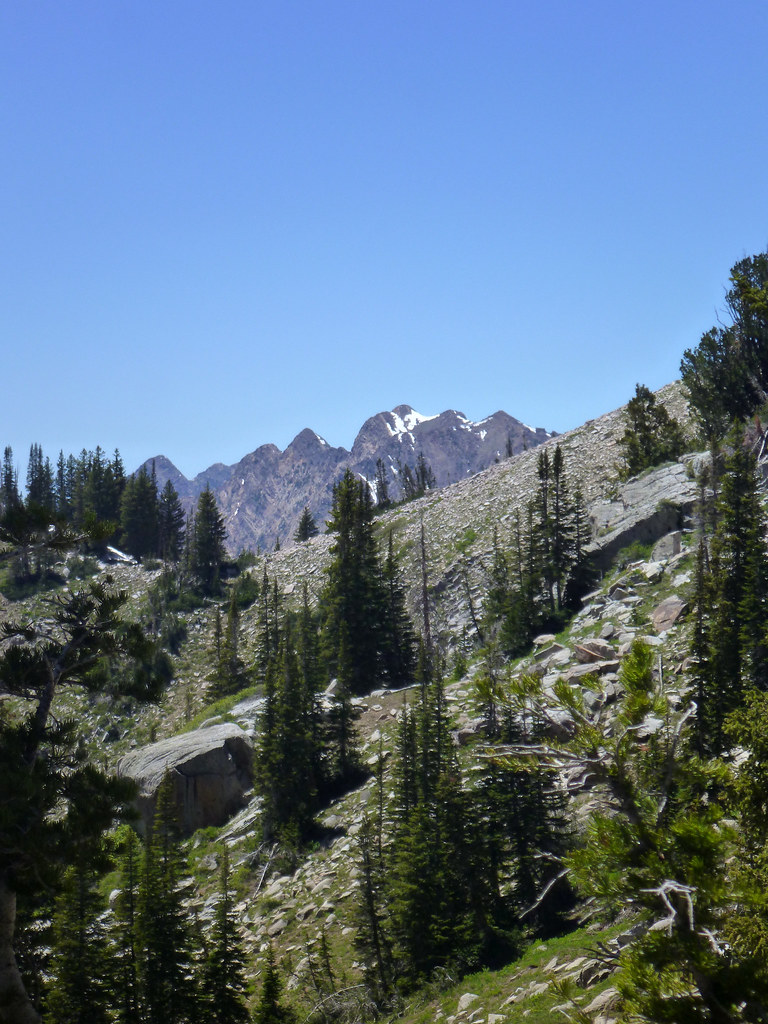
Pfeifferhorn’s NE face from Little Pfeifferhorn
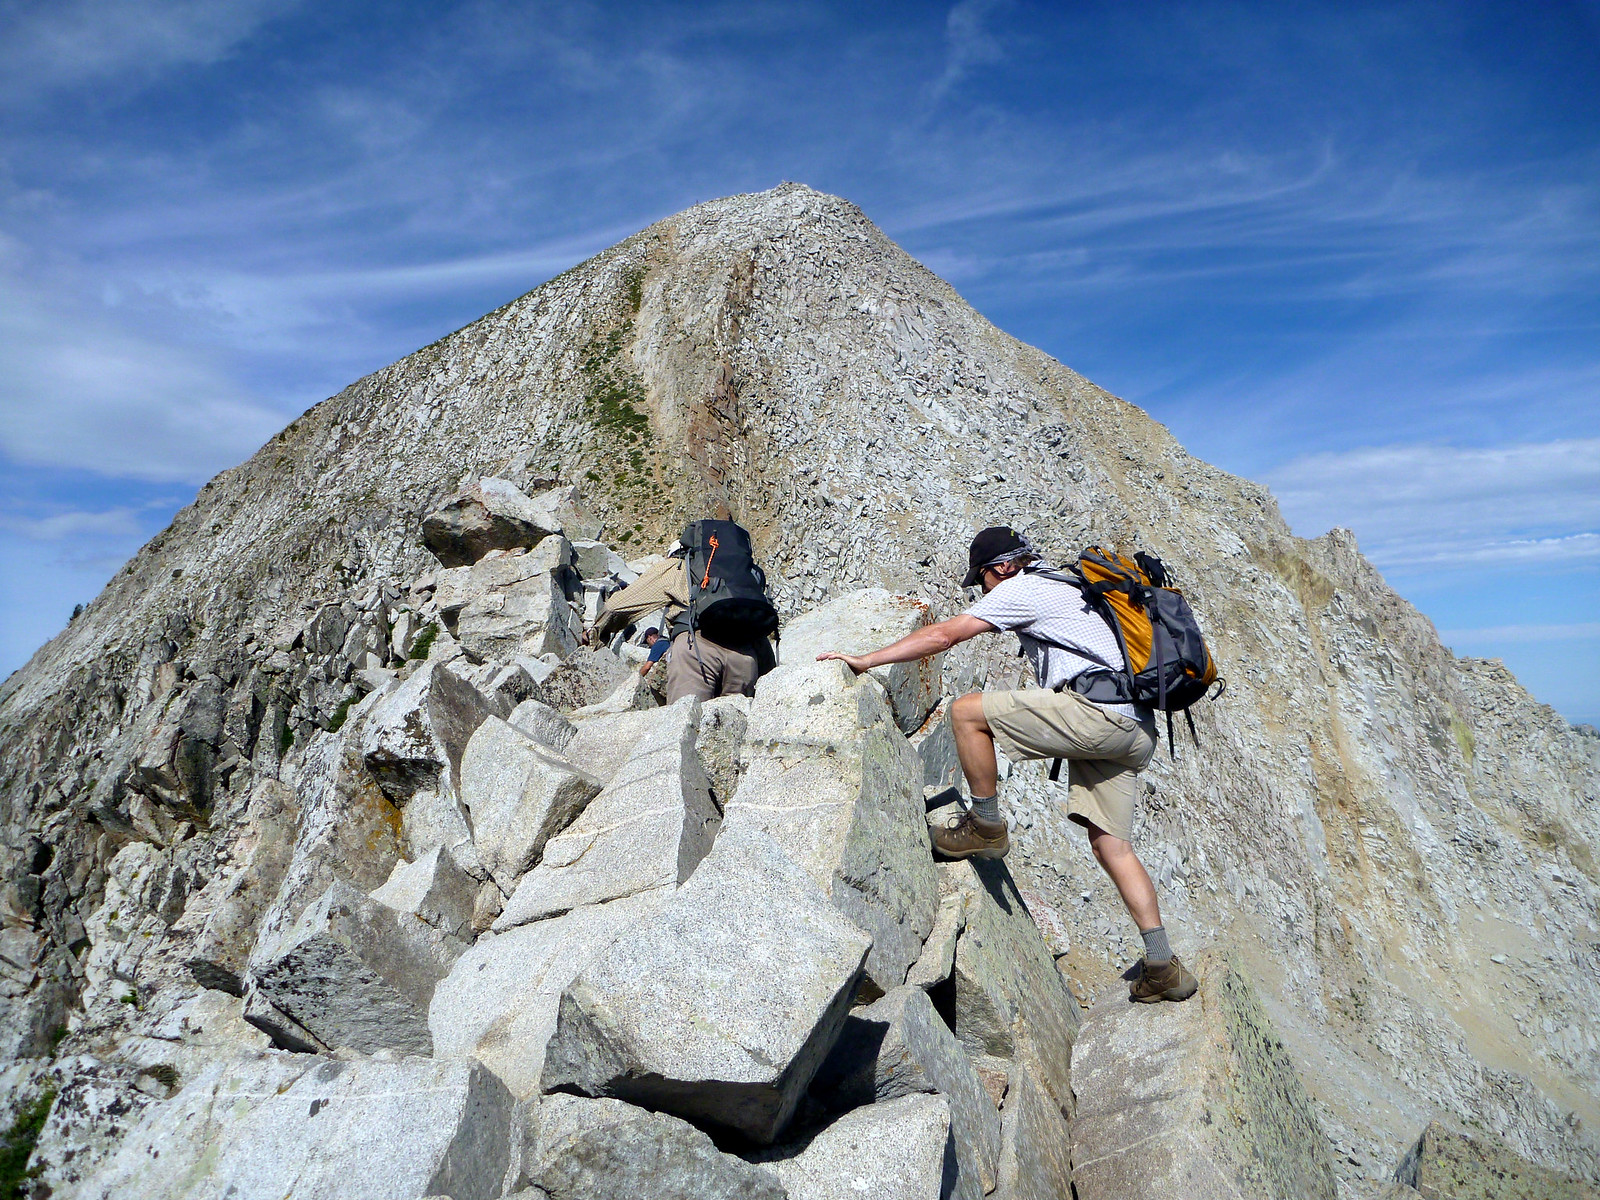
Soon we reached the (in)famous Knife Edge approaching Pfeifferhorn’s East Ridge.
The Knife EdgeScrambling the knife edge (really not that bad)
We topped out and started down the opposite ridge to continue the Beatout towards the unnamed peak west of Pfeifferhorn (UPWOP Peak).
Summit shot on PfeifferhornHeading down PfeifferhornPfeifferhorn’s imposing West FacePfeifferhorn
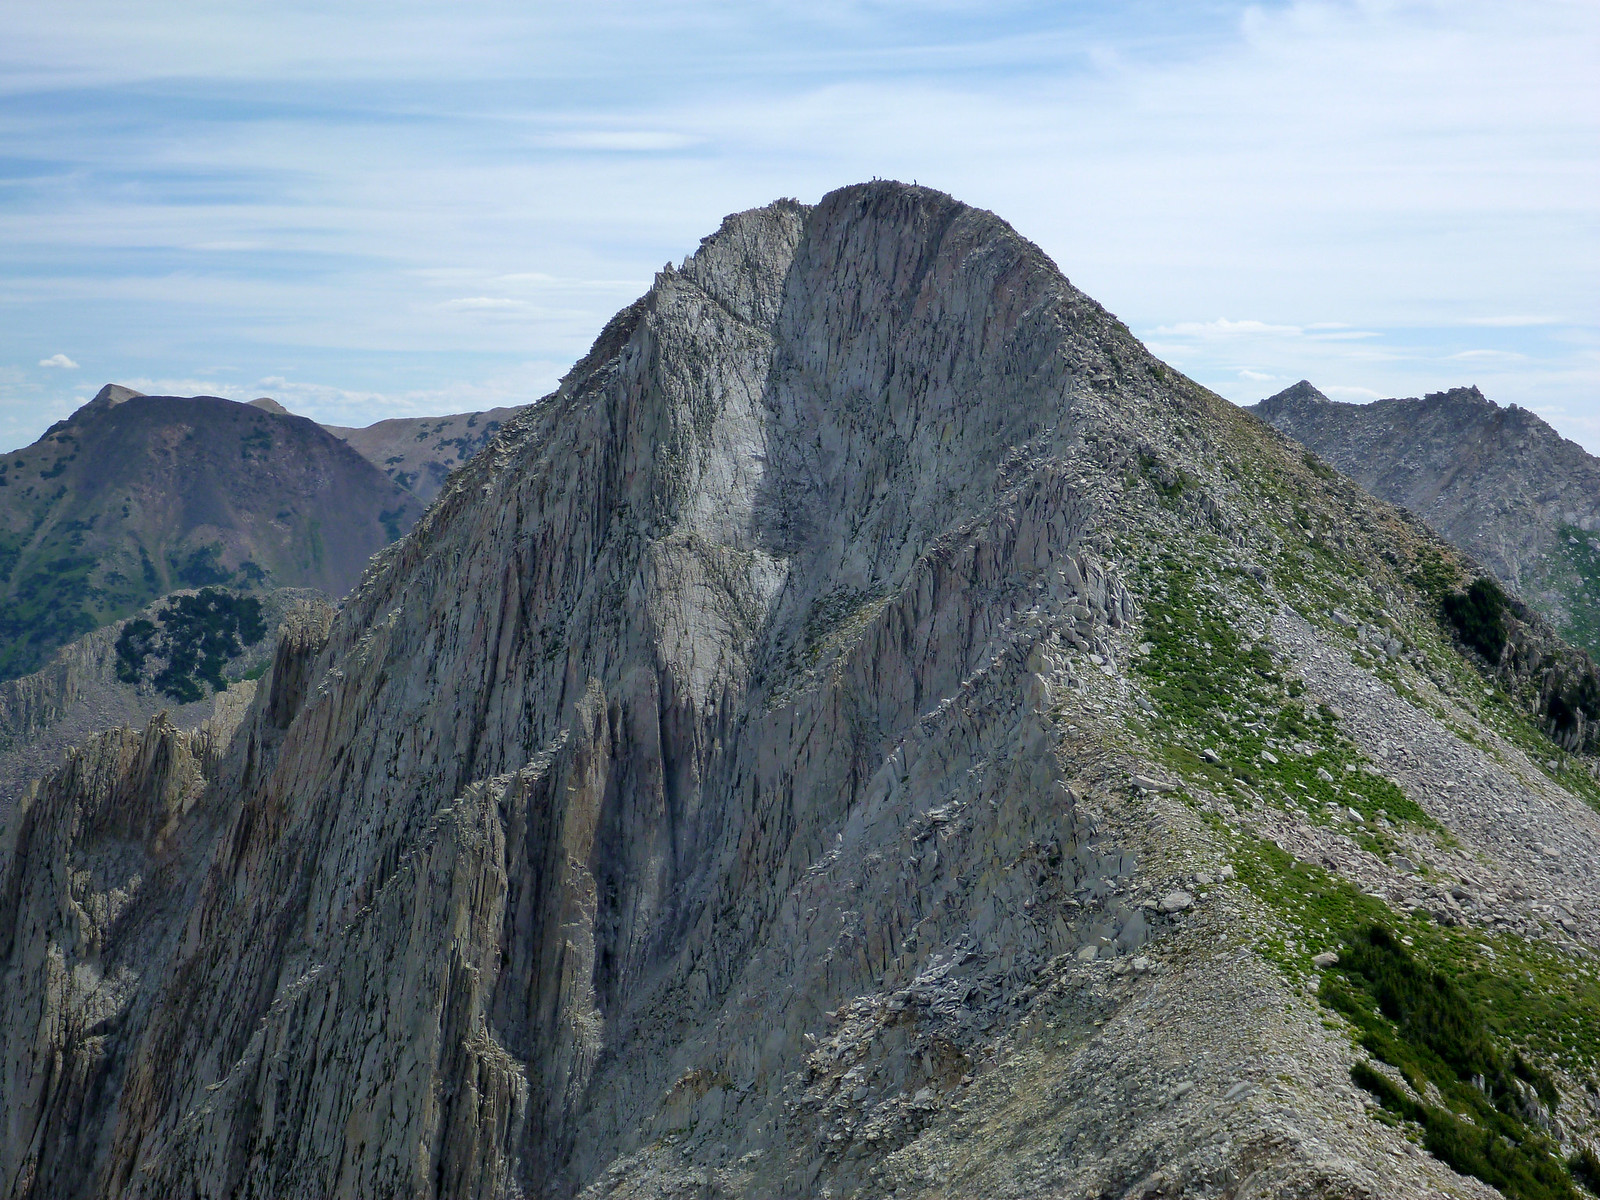
The views of Pfeifferhorn are outstanding from this part of the ridge – a unique side of the mountain not visible from anyplace else. Next we reached the summit of Upwop and continued down the other side to Chipman Peak.
Chipman Peak
This part of the trip was the most challenging scramble of the day – some boulders are stacked up precariously so be on the lookout, but in general the rock is excellent in quality and the scrambling is fun. The exposure can largely be avoided.
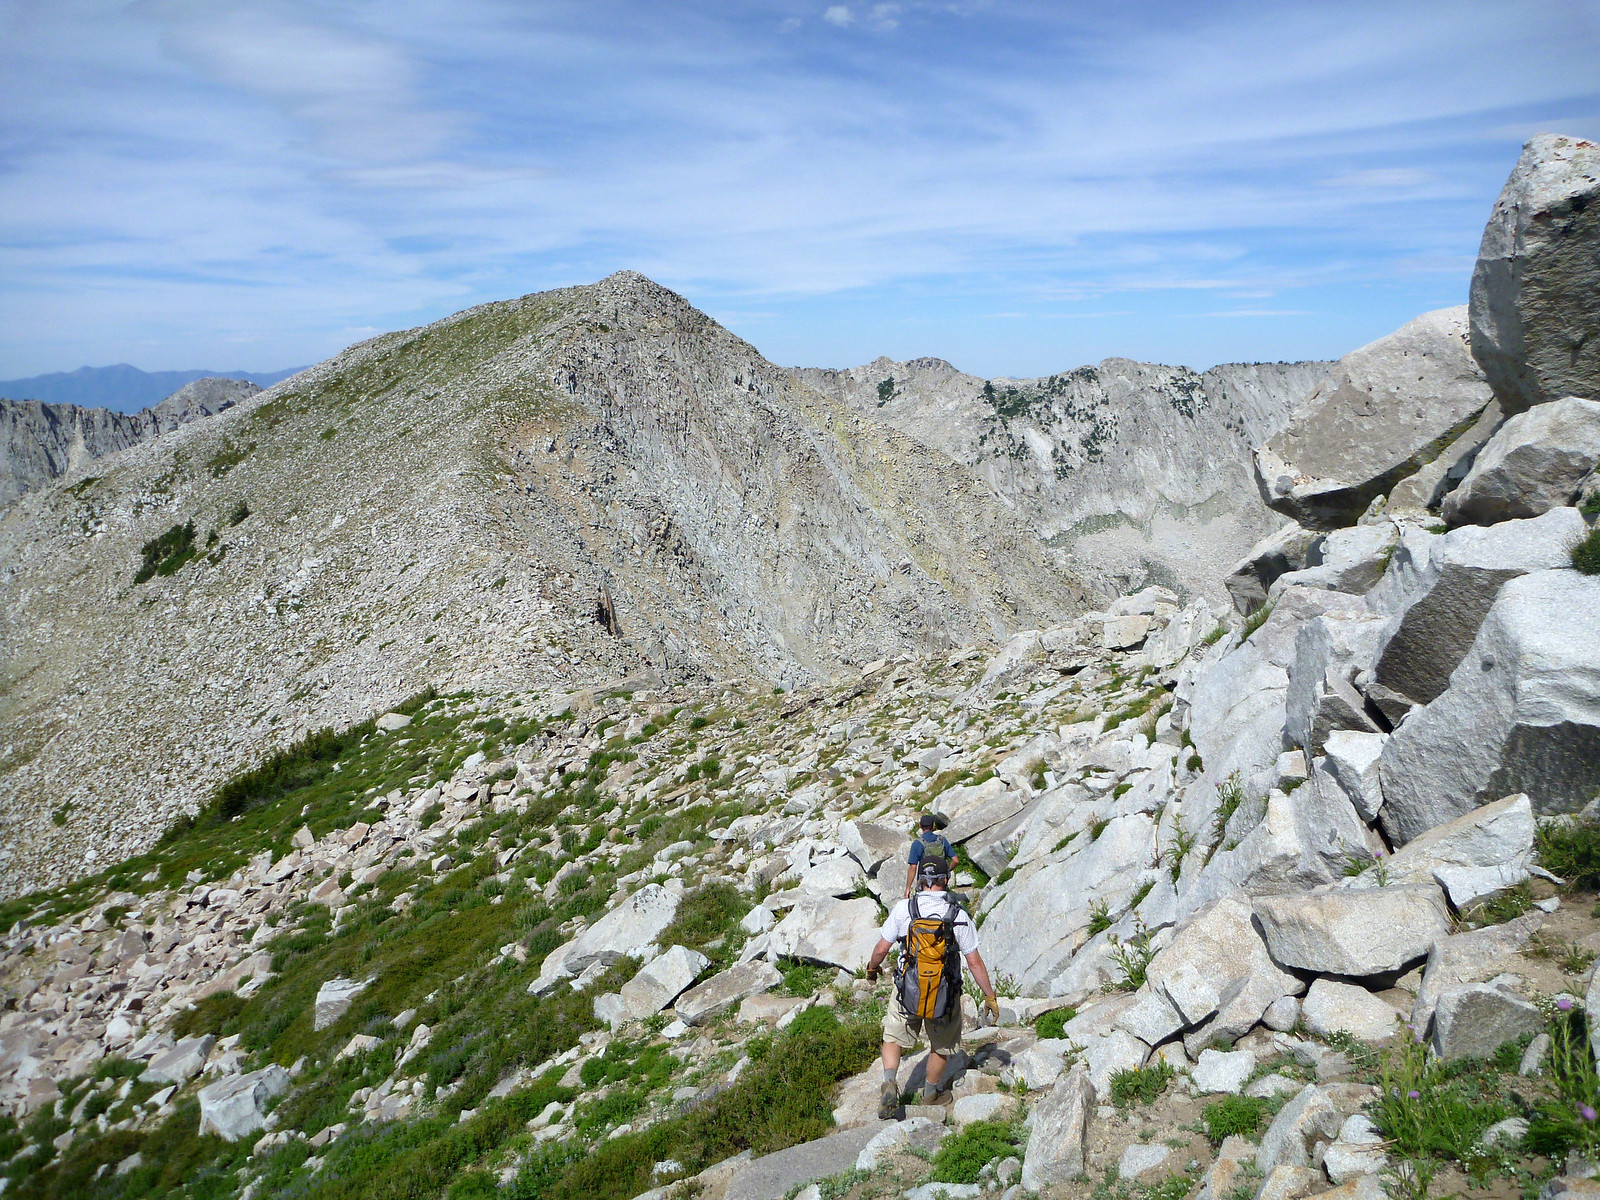
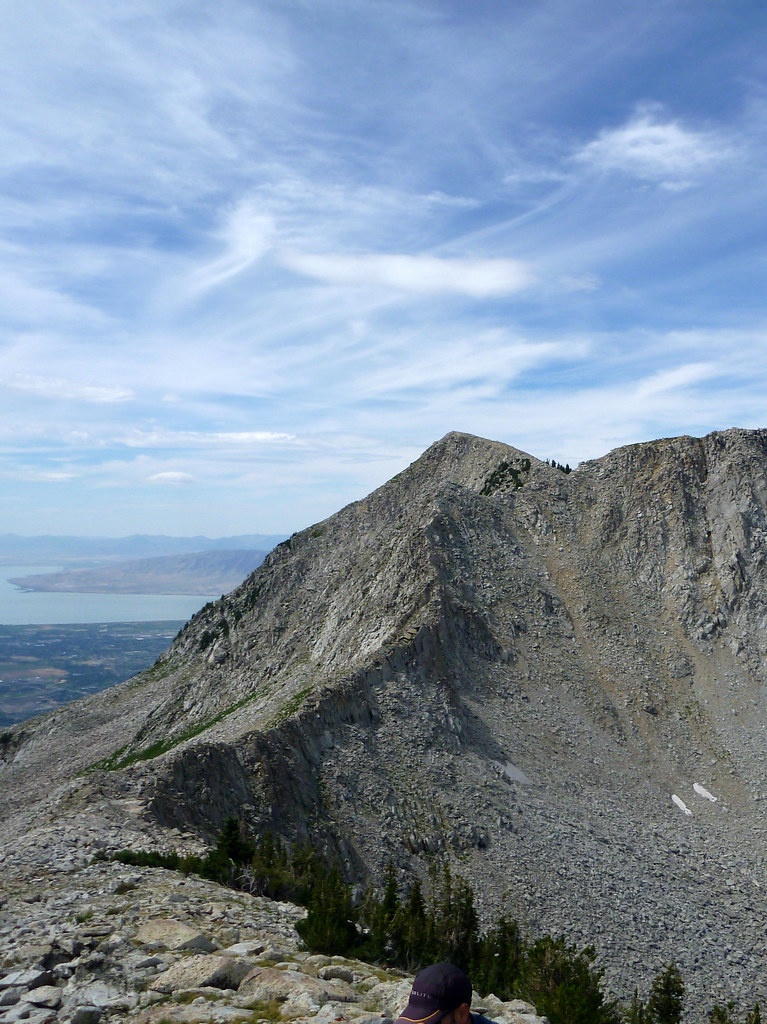
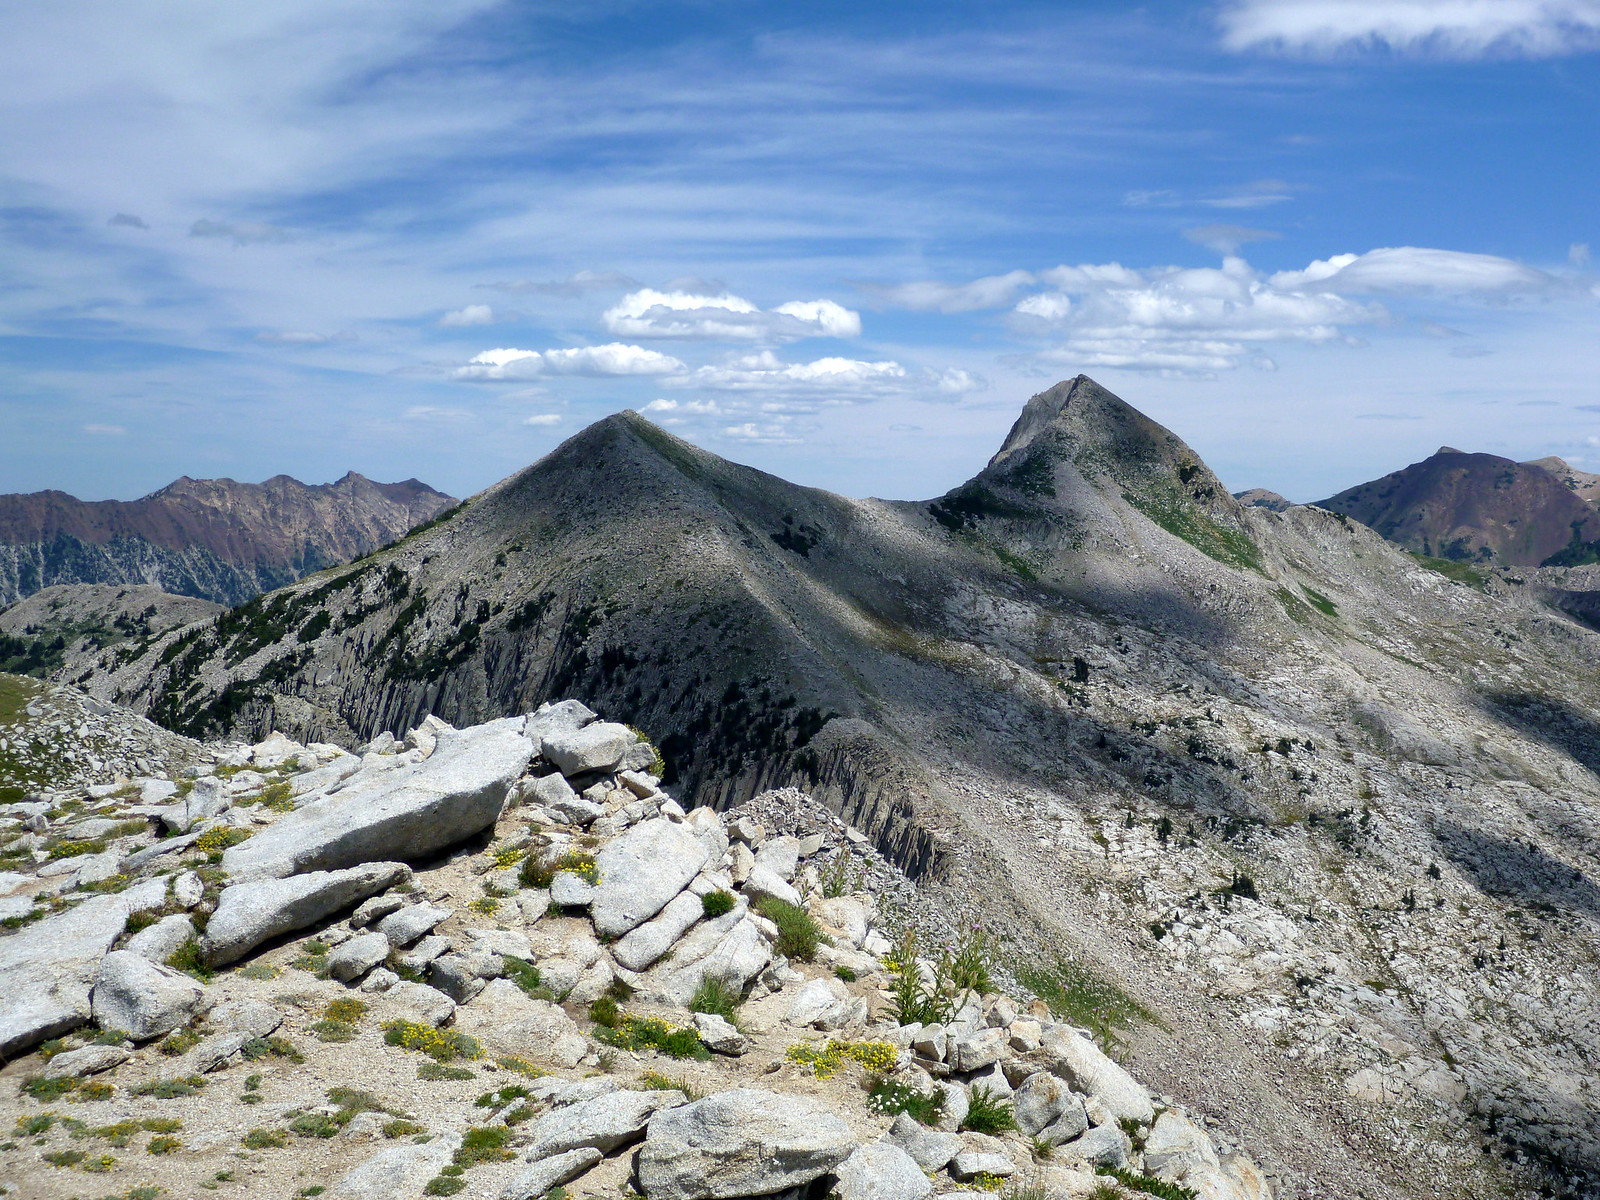
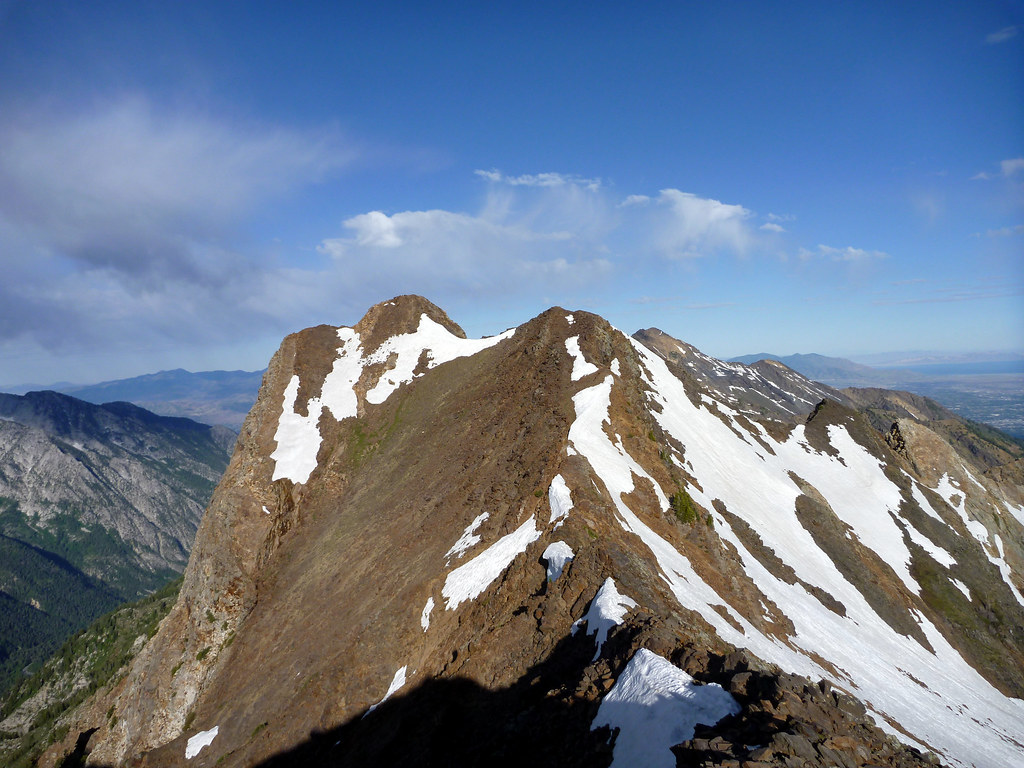
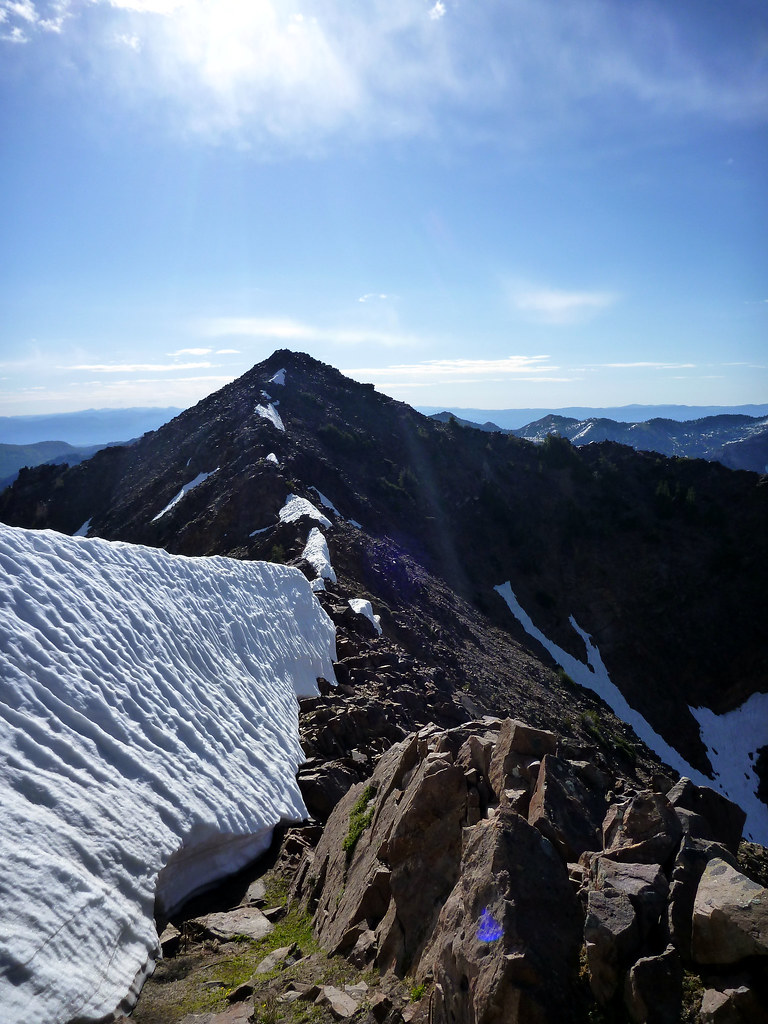
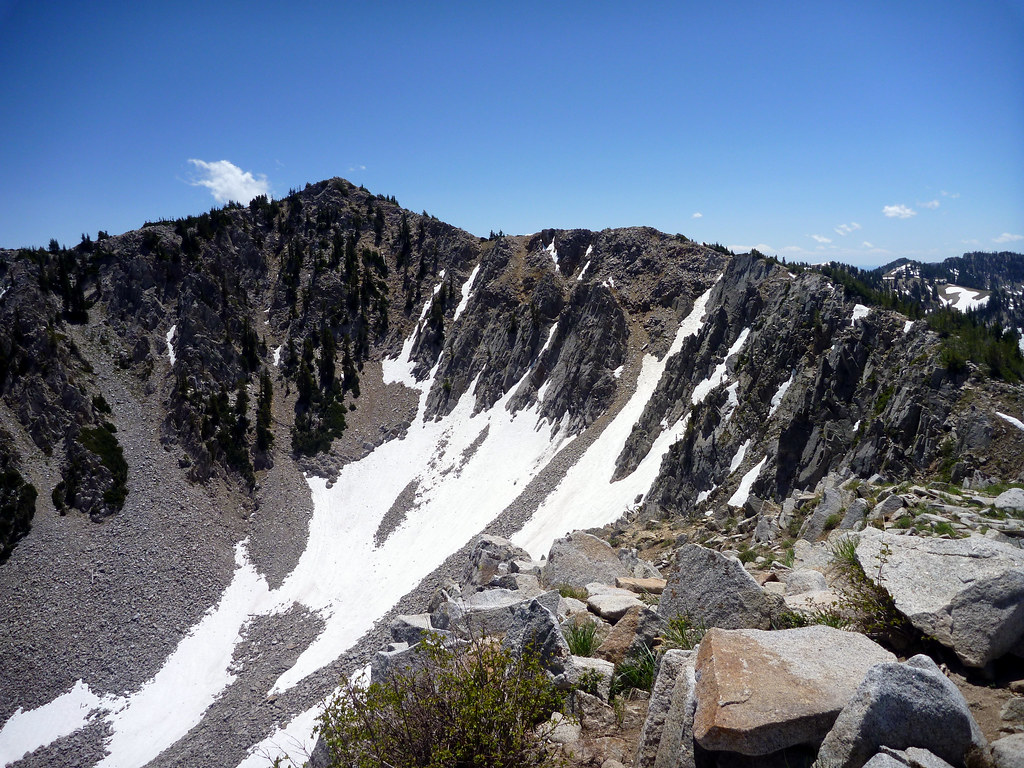
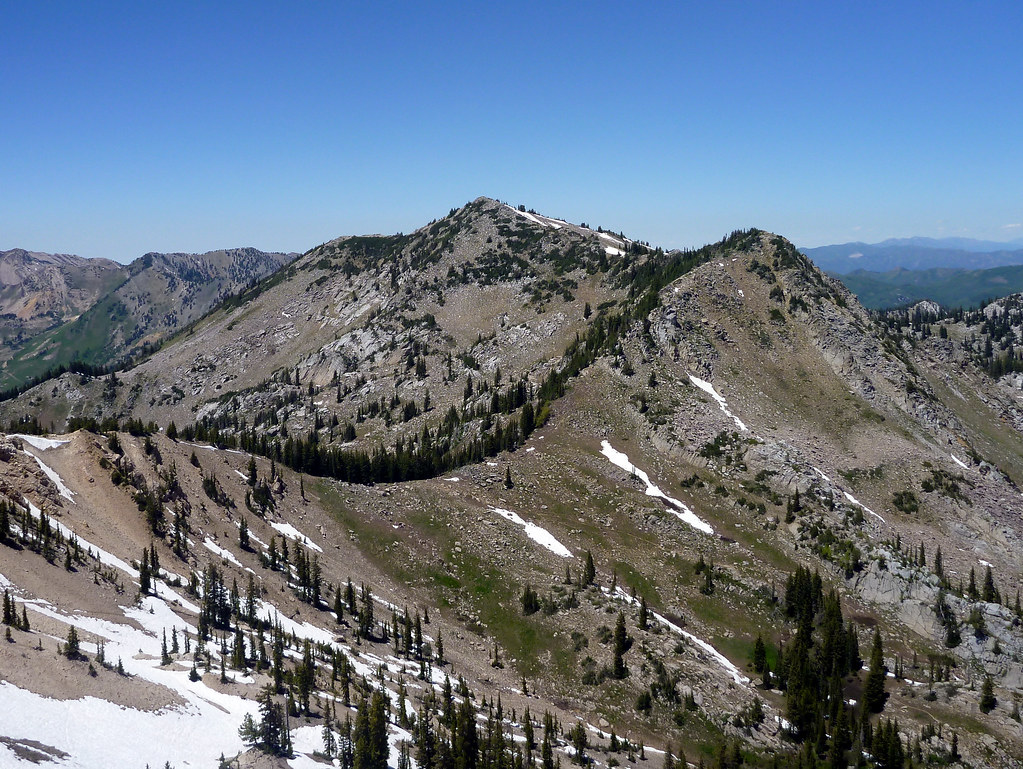
Lightning Ridge
From here Lightning Ridge forms the remainder of the route to South Thunder mountain. It looks worse than it is, but it sure is impressive.
Looking back towards UpwopScrambling toward ChipmanScrambling toward ChipmanHigher up on Chipman
The next landmark is the saddle between Chipman and Lightning ridge. We dropped packs and made the quick run to bag Chipman.
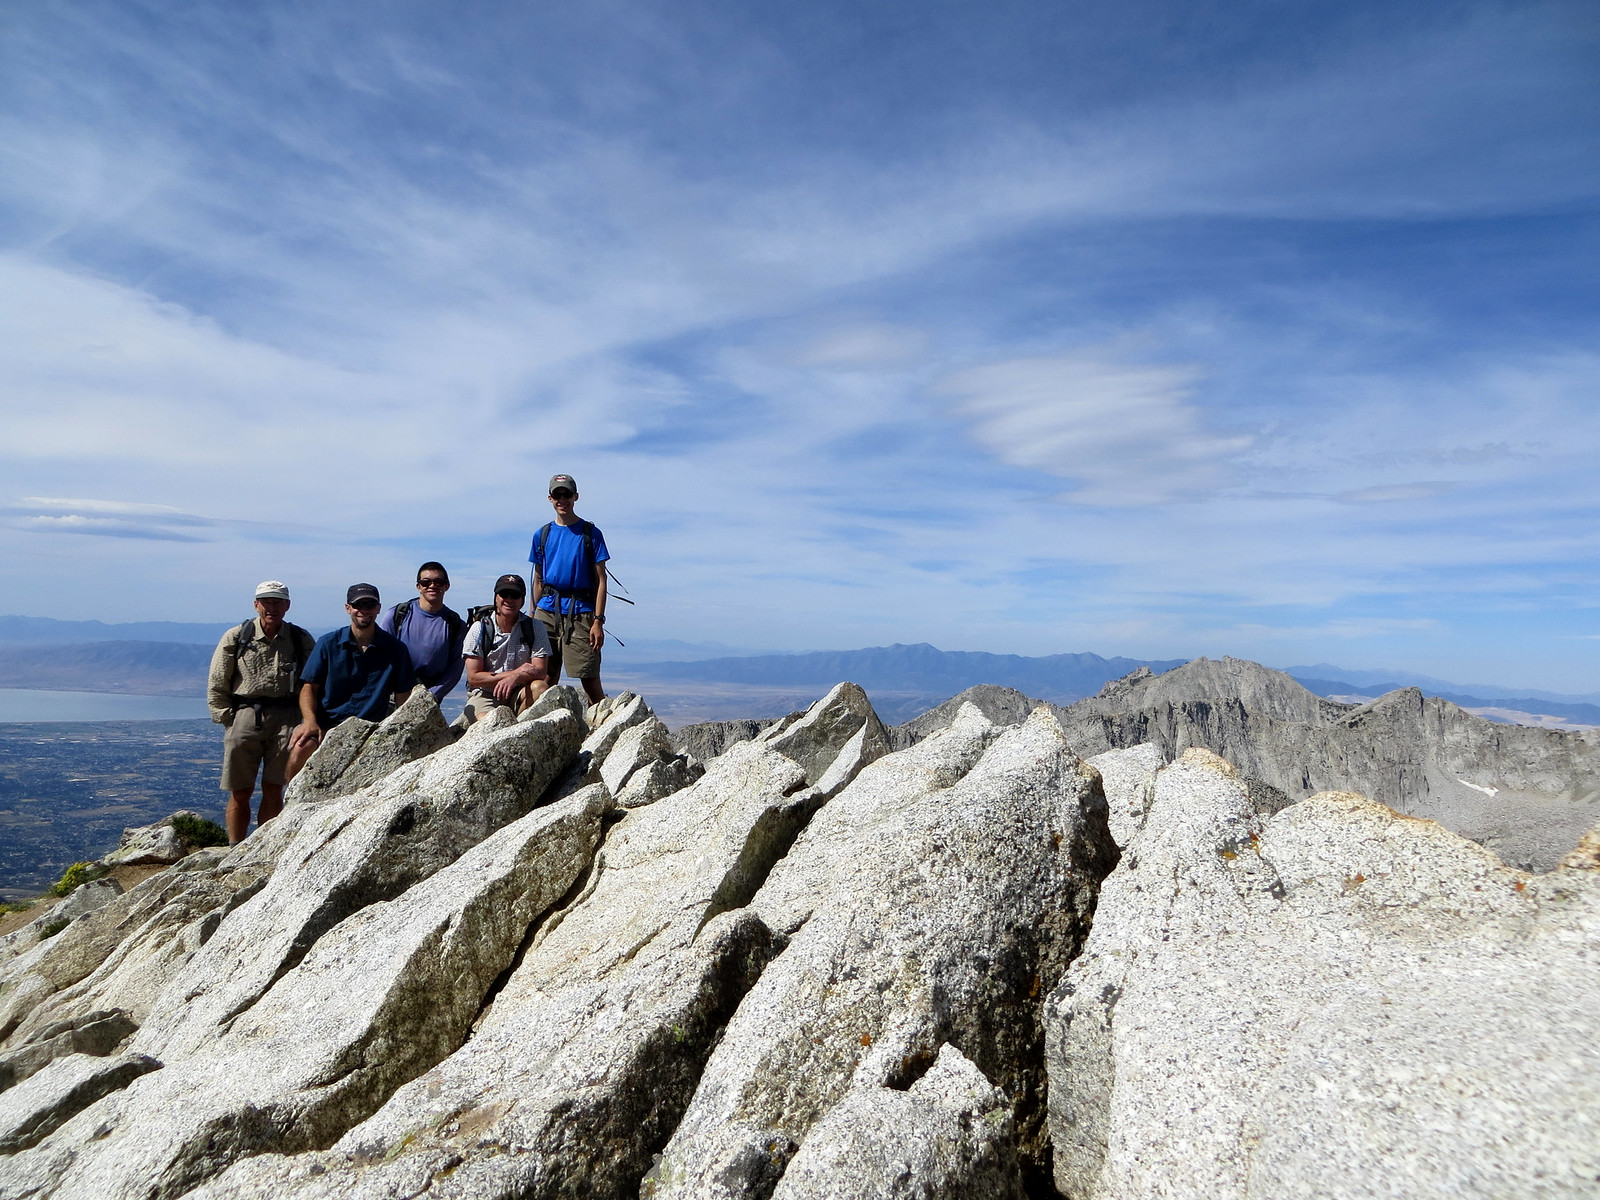
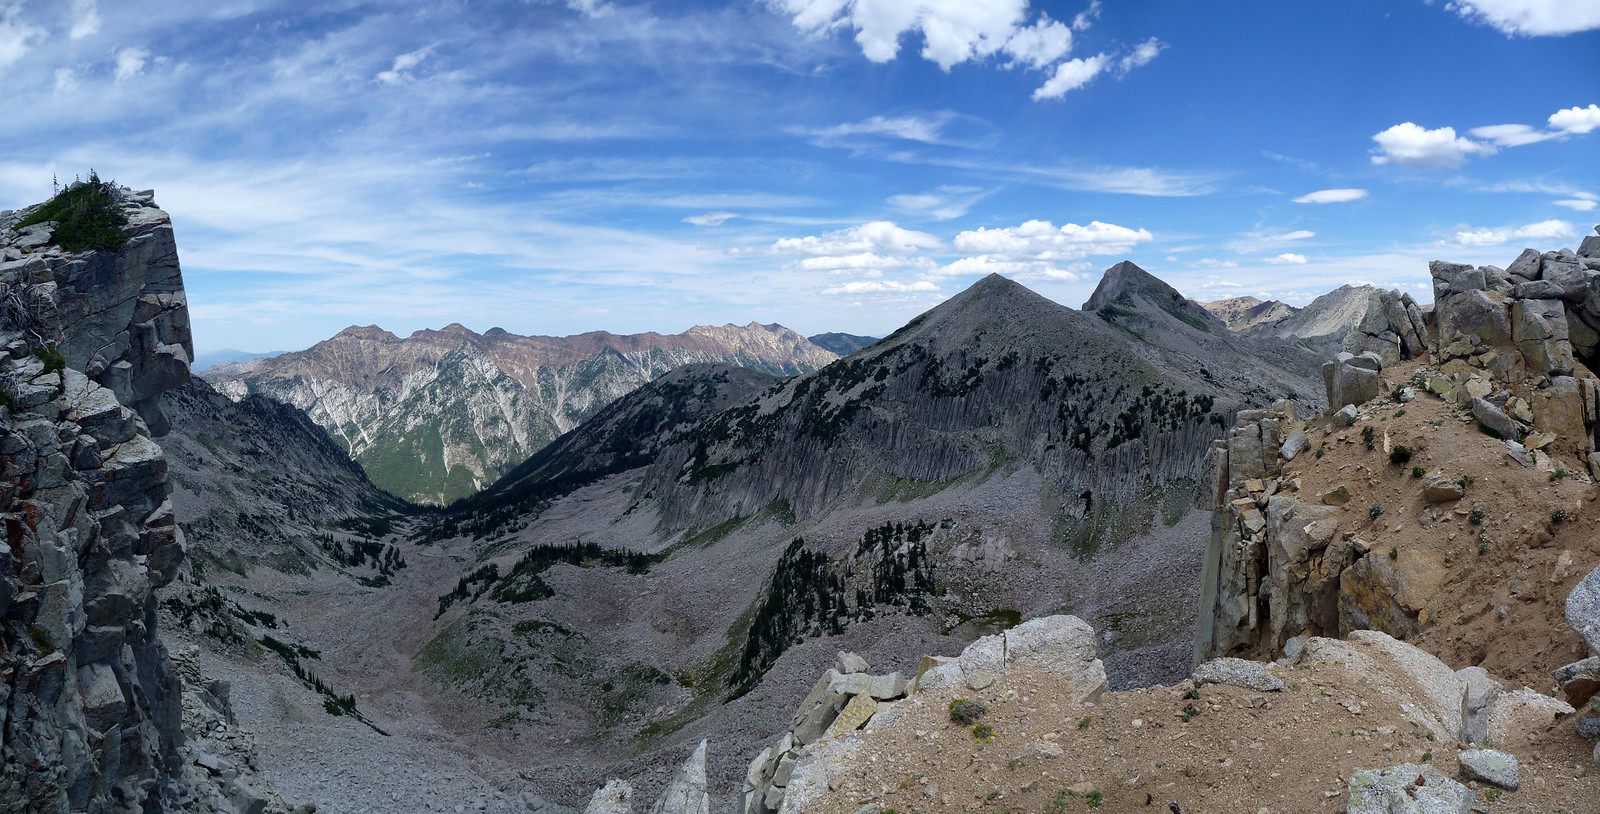
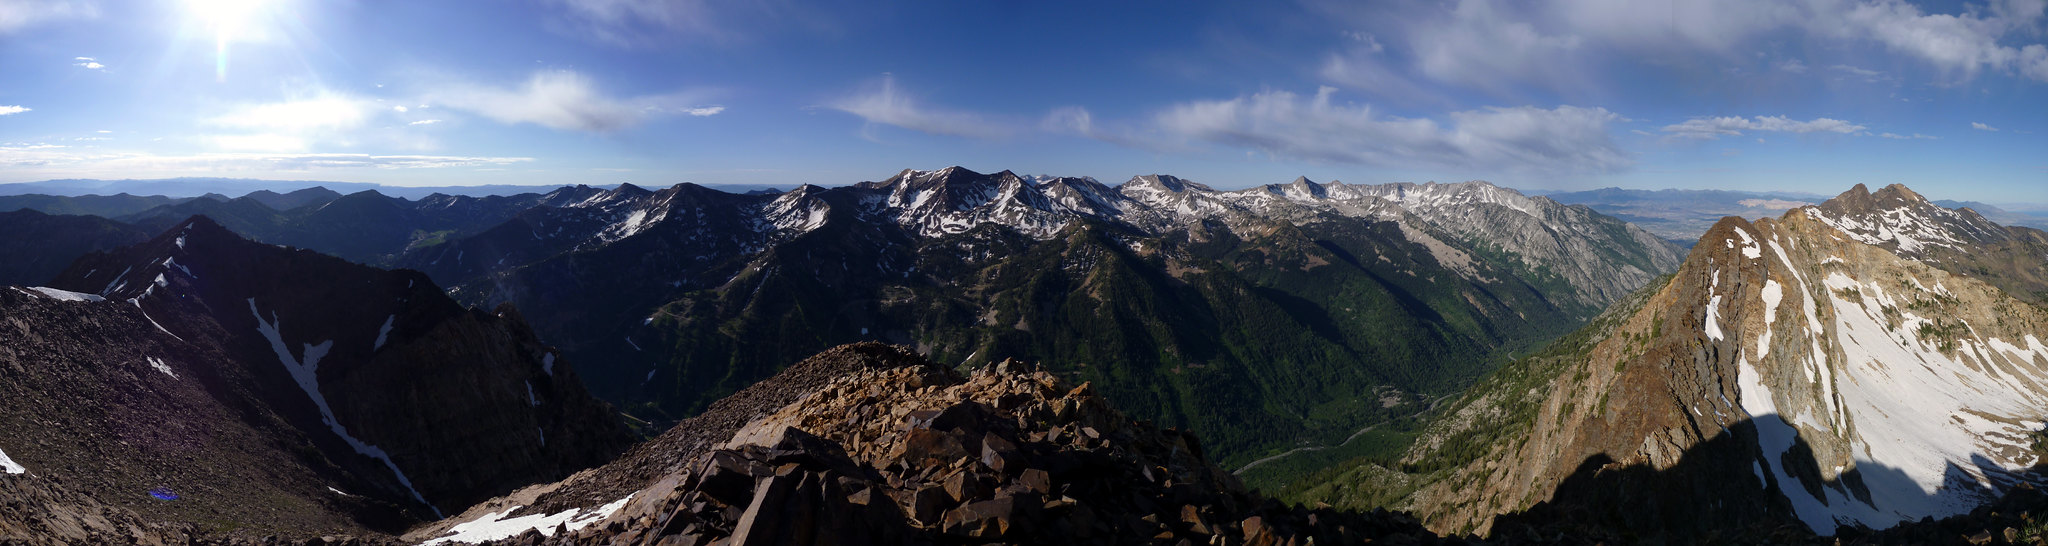
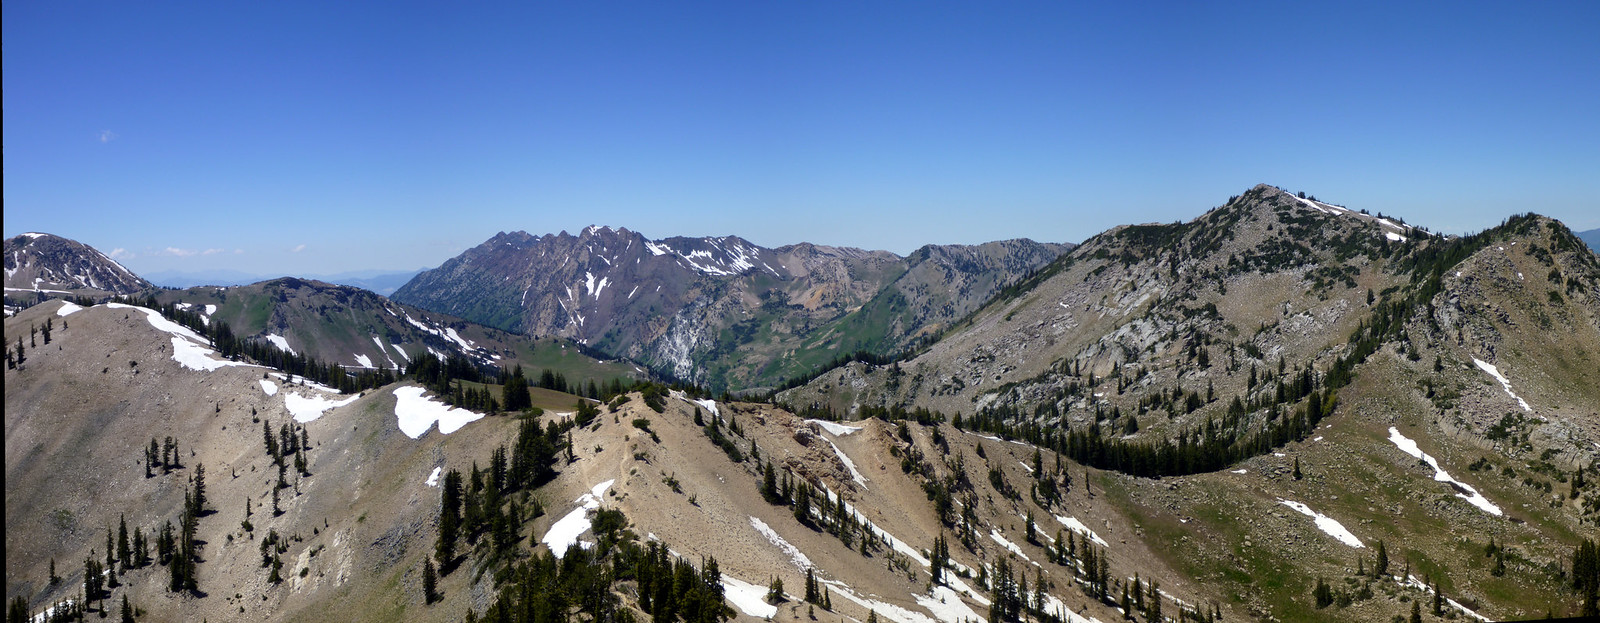
South side of Lightning Ridge from the Chipman saddlePano from the summit of Chipman. Box Elder and Timpanogos behind. (Click to expand)Looking back at Pfeifferhorn and Upwop from the summit of Chipman
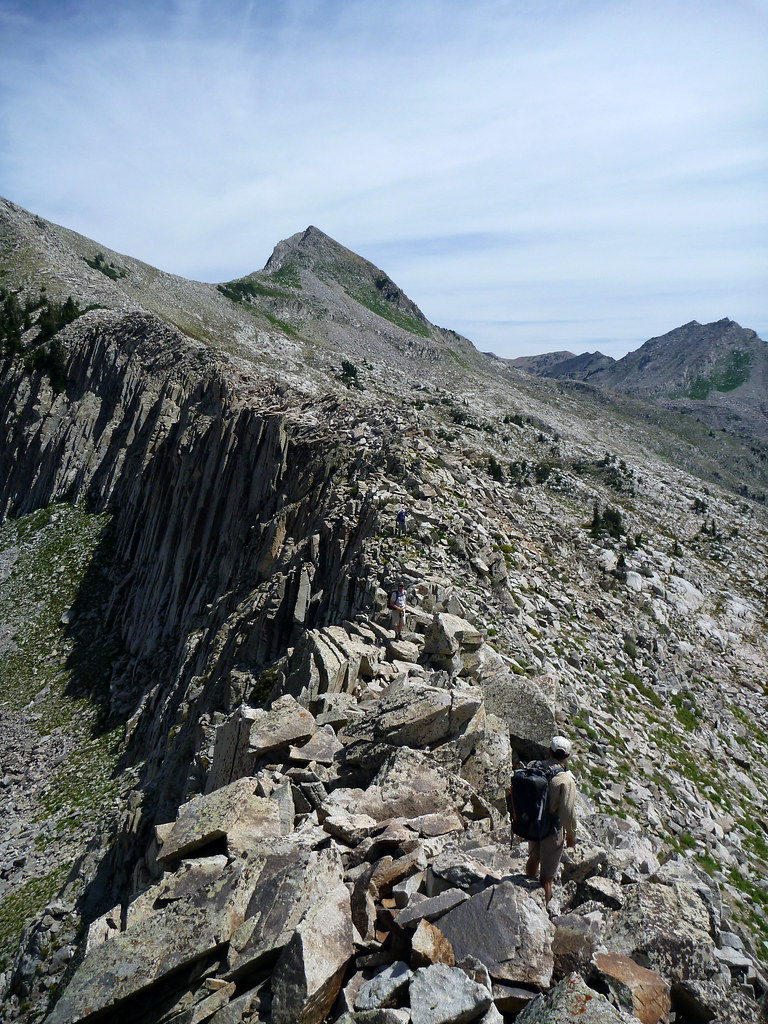
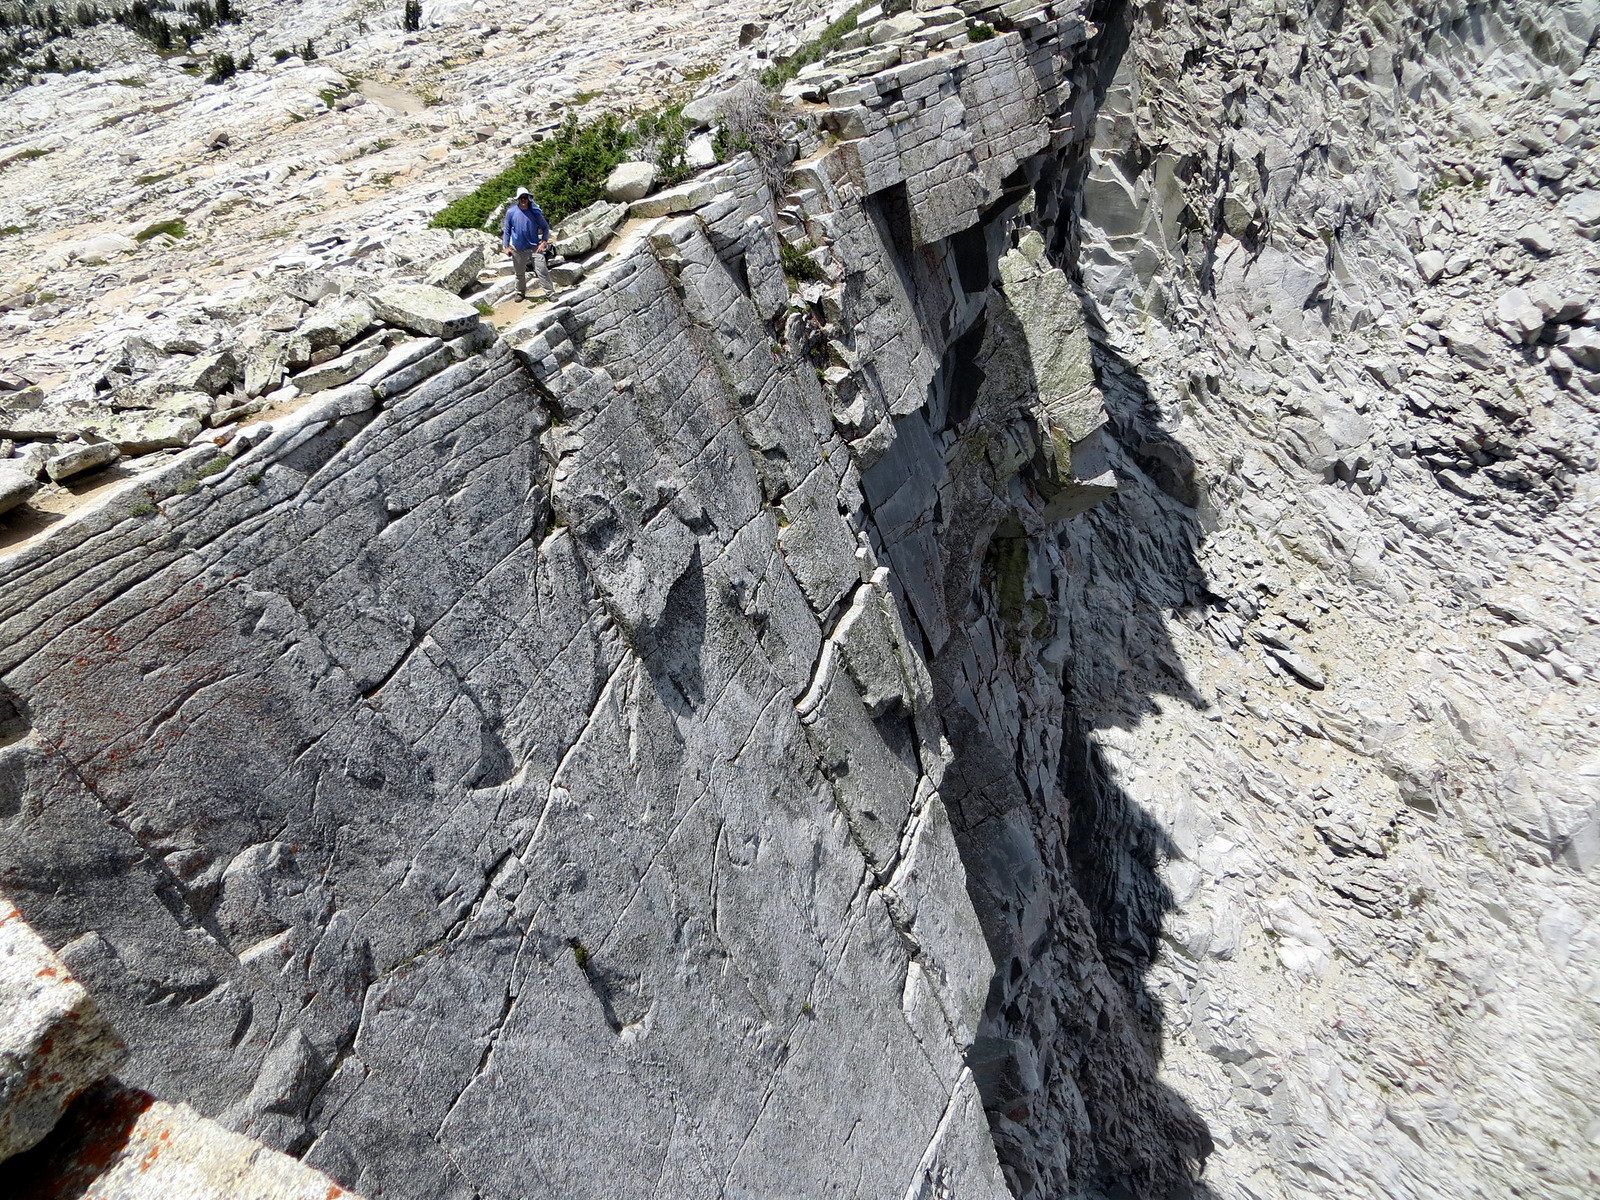
We picked up our packs and continued along the crest of Lightning ridge, generally staying on the south side to avoid the worst of the exposure. This was my favorite part of the hike. The views are outstanding, the rock solid, and the scrambling a blast.
Hole in the ridge crest (click to expand)Messing around on Lightning RidgeA little bit of exposure in places….
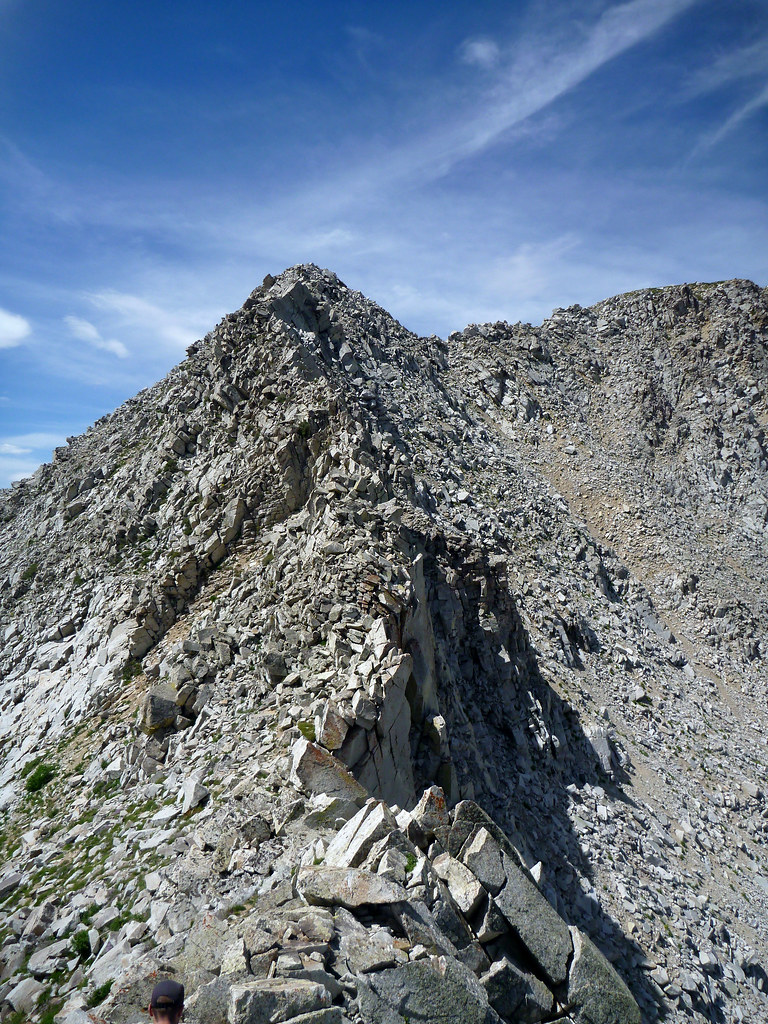
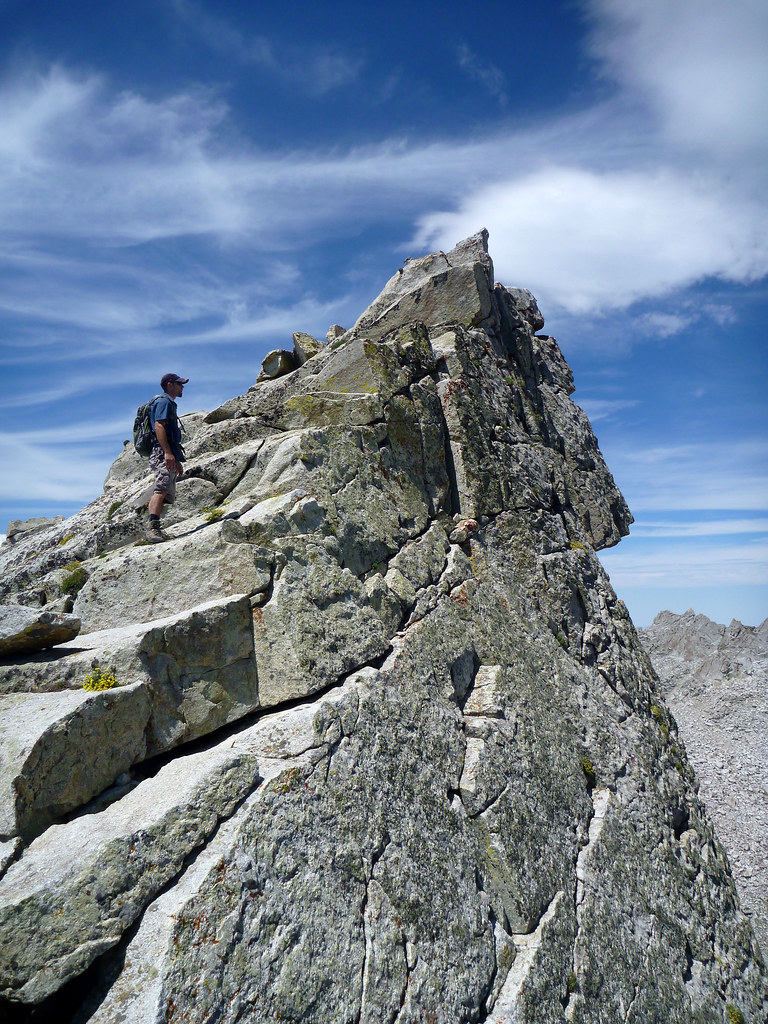
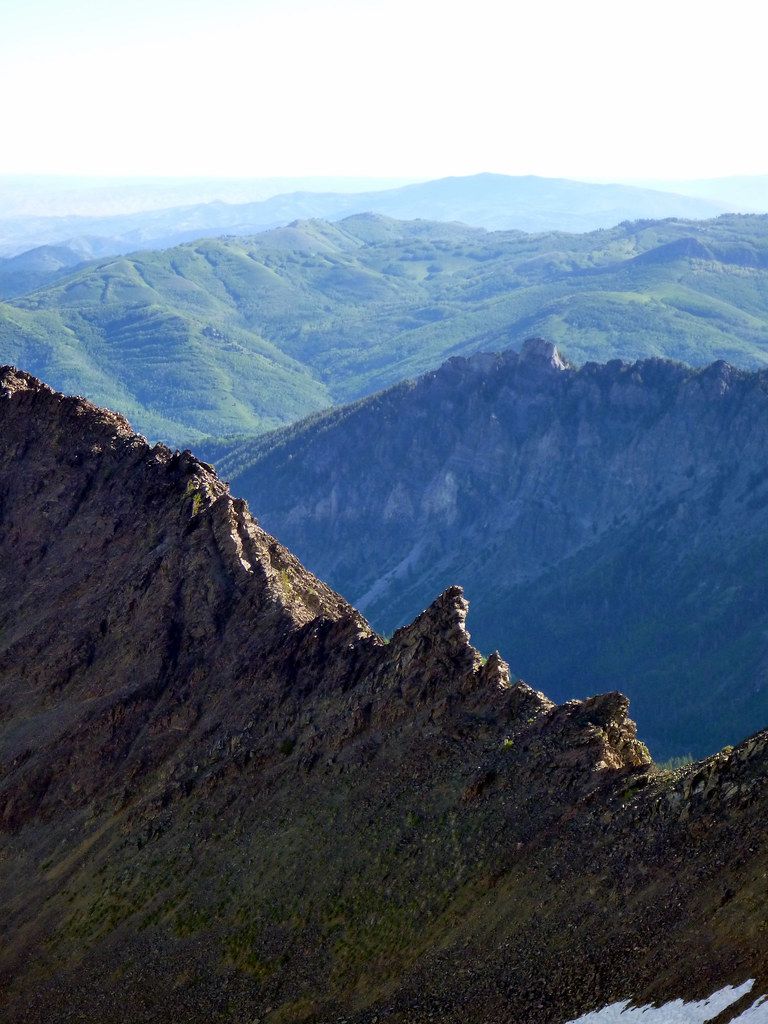
We continued along the ridge, dropping a bit further down to the south to avoid some cliff bands around the South Thunder saddle. The scrambling continued its excellent quality.
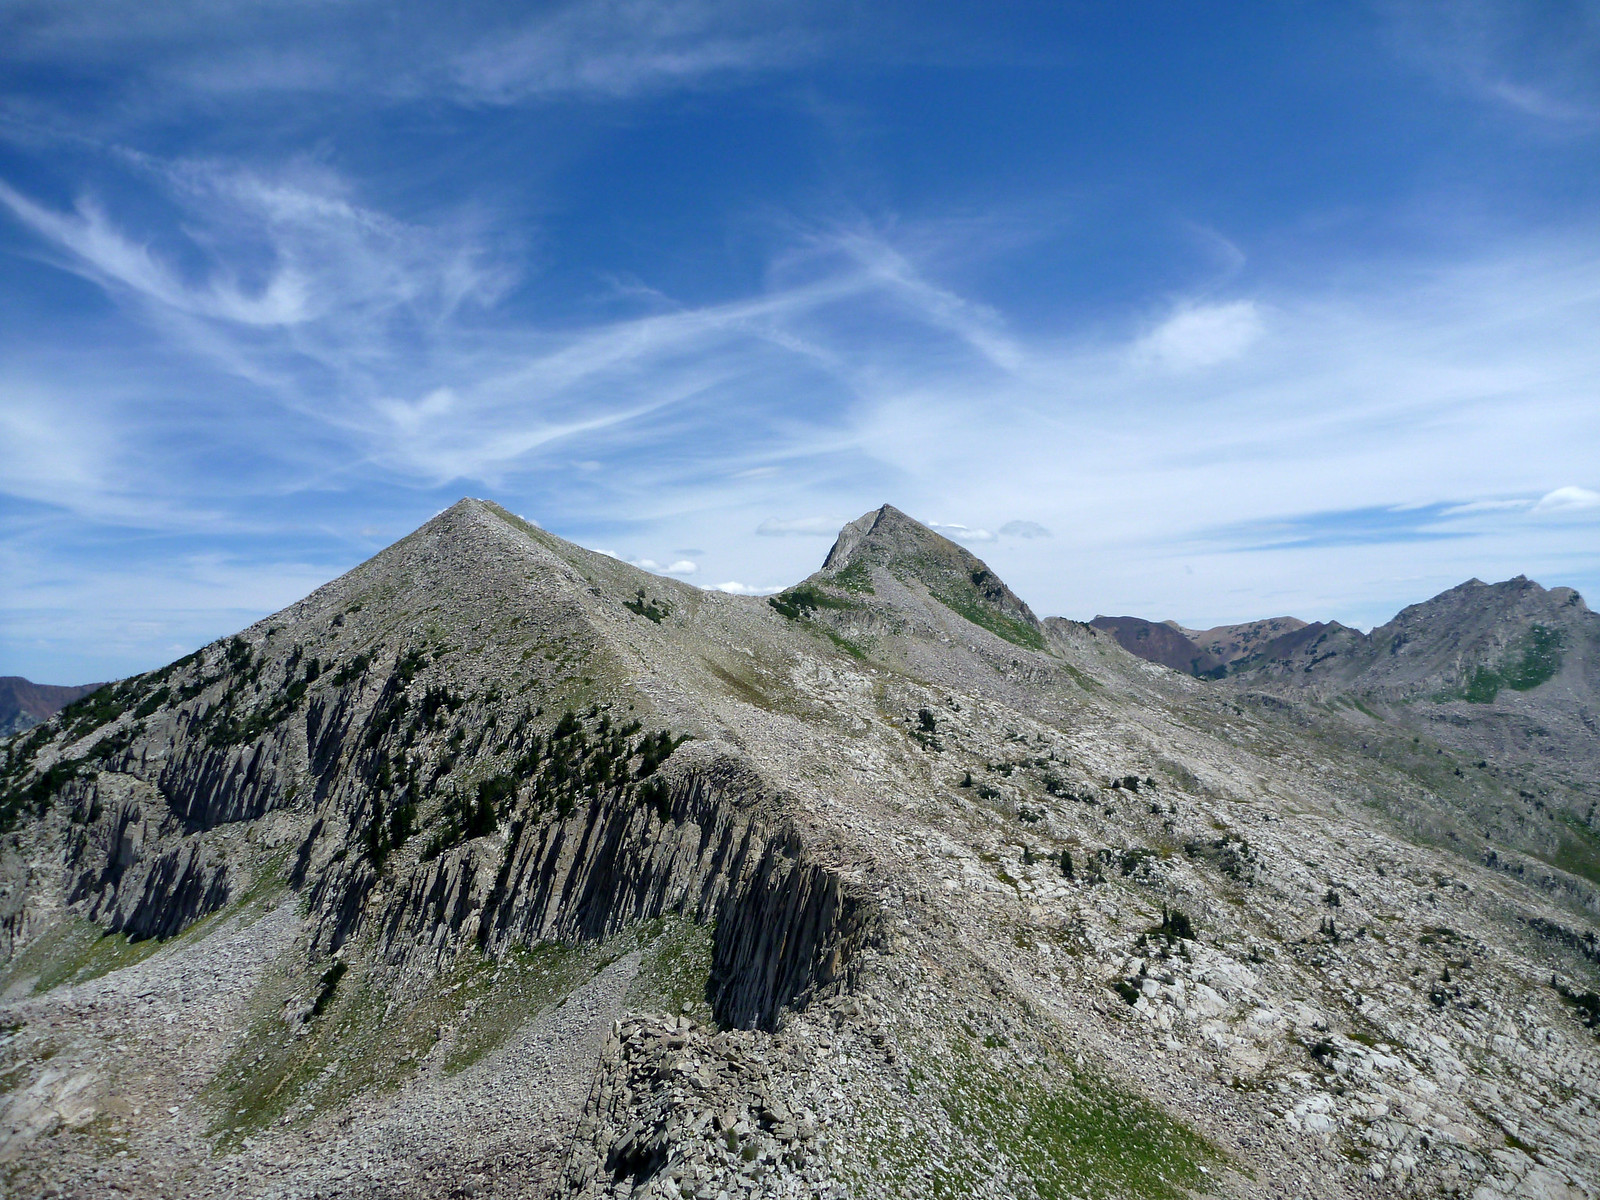
Lightning RidgeLightning Ridge is spectacularCool obelisk
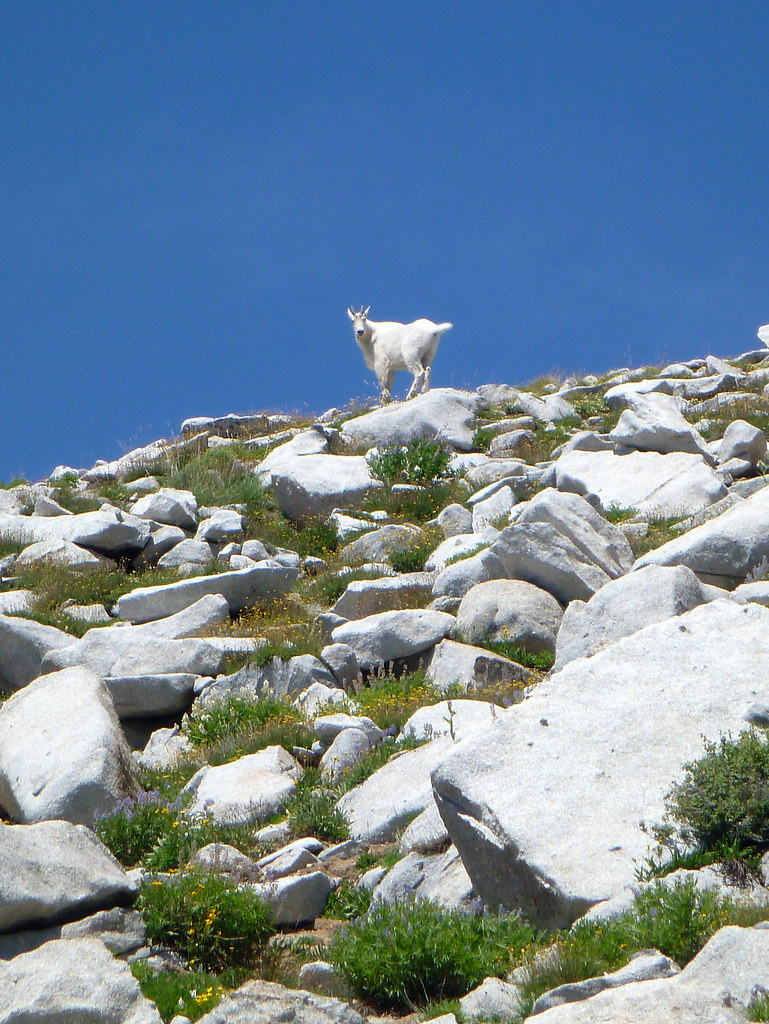
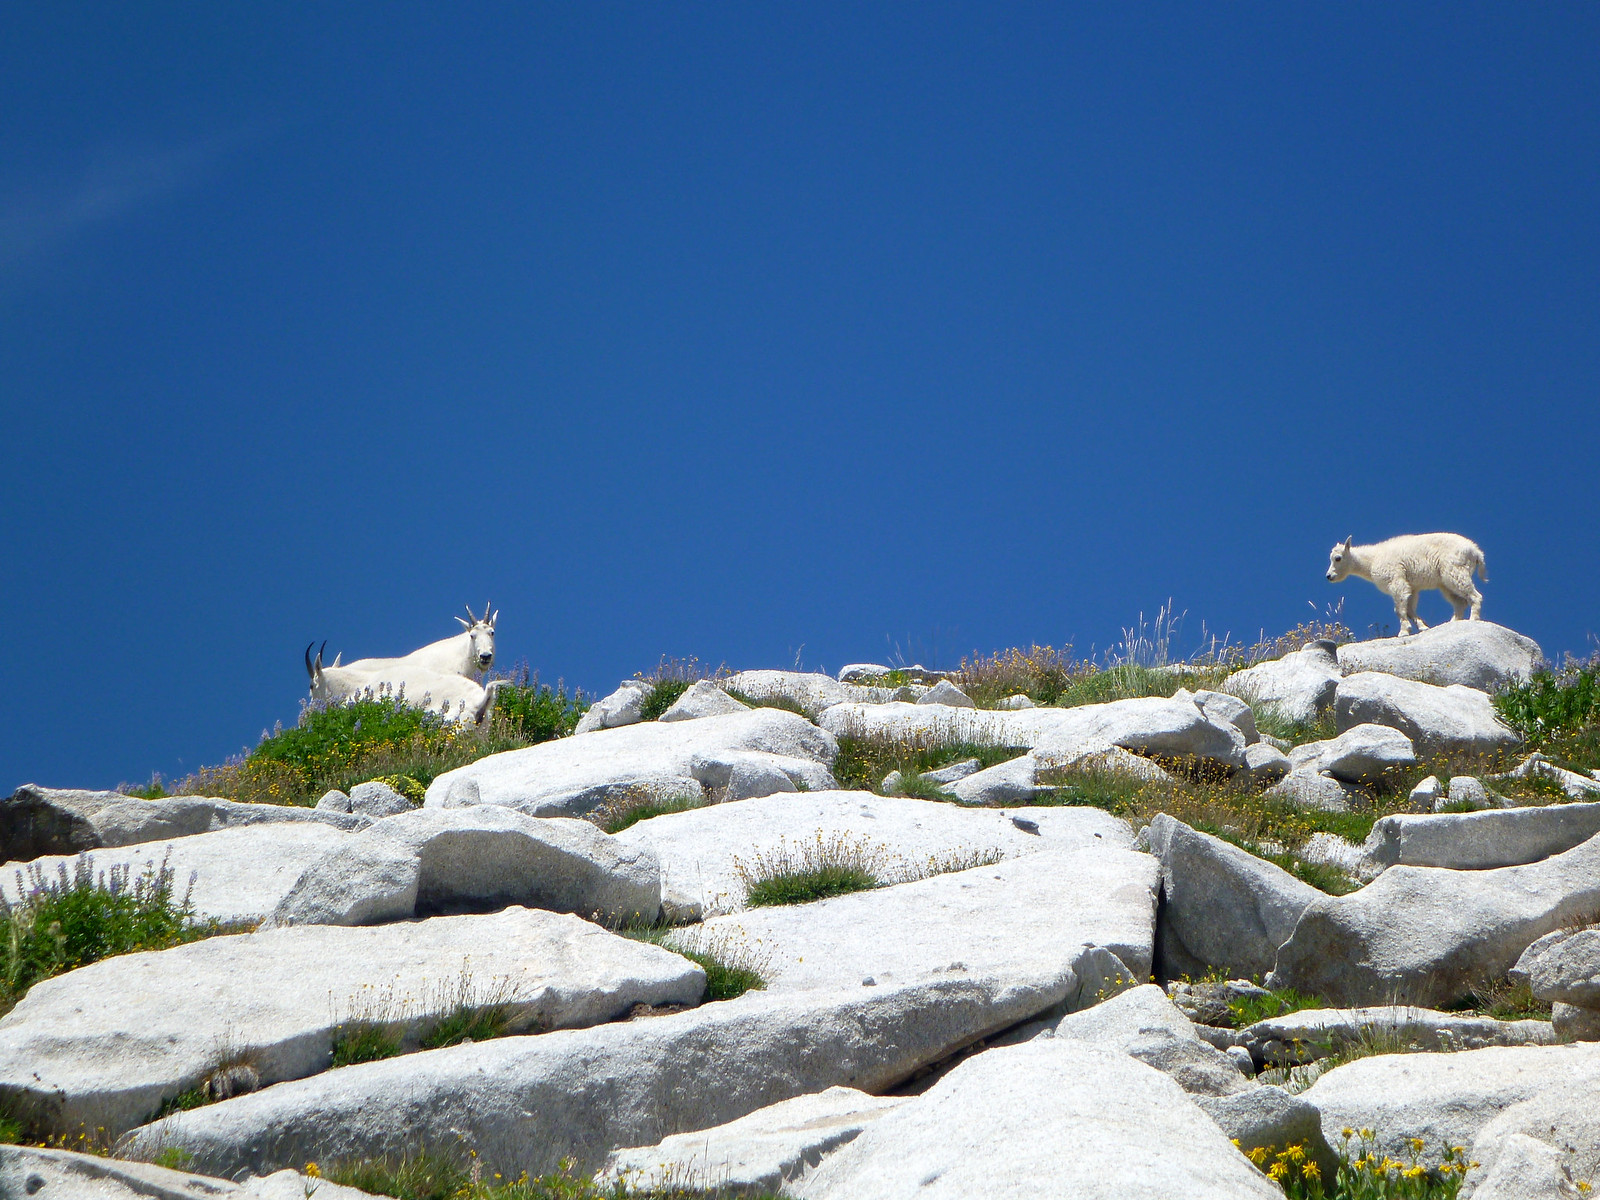
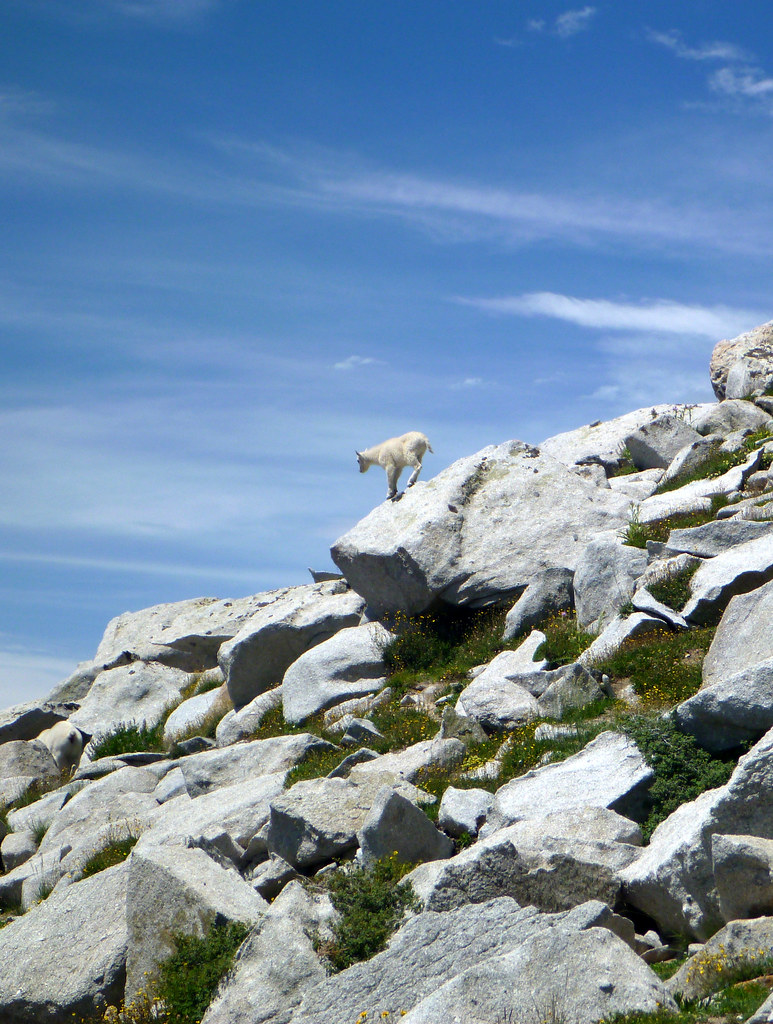
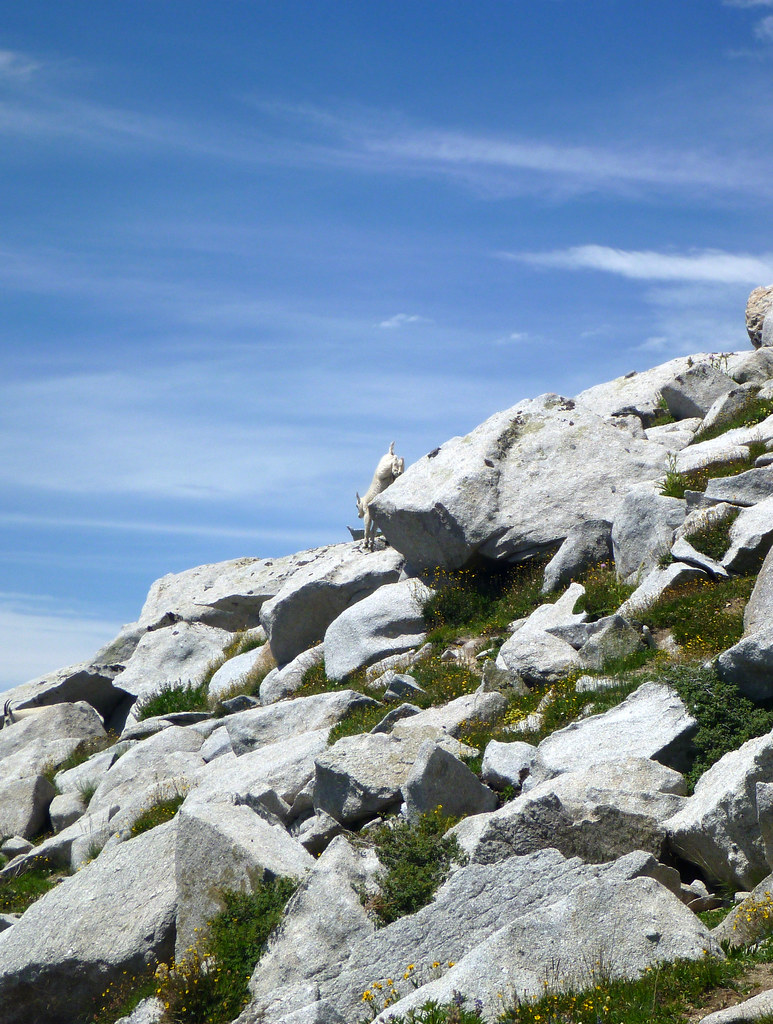
Before reaching South Thunder, we were surprised to see a bunch of mountain goats with the purest white coat I’ve ever seen.
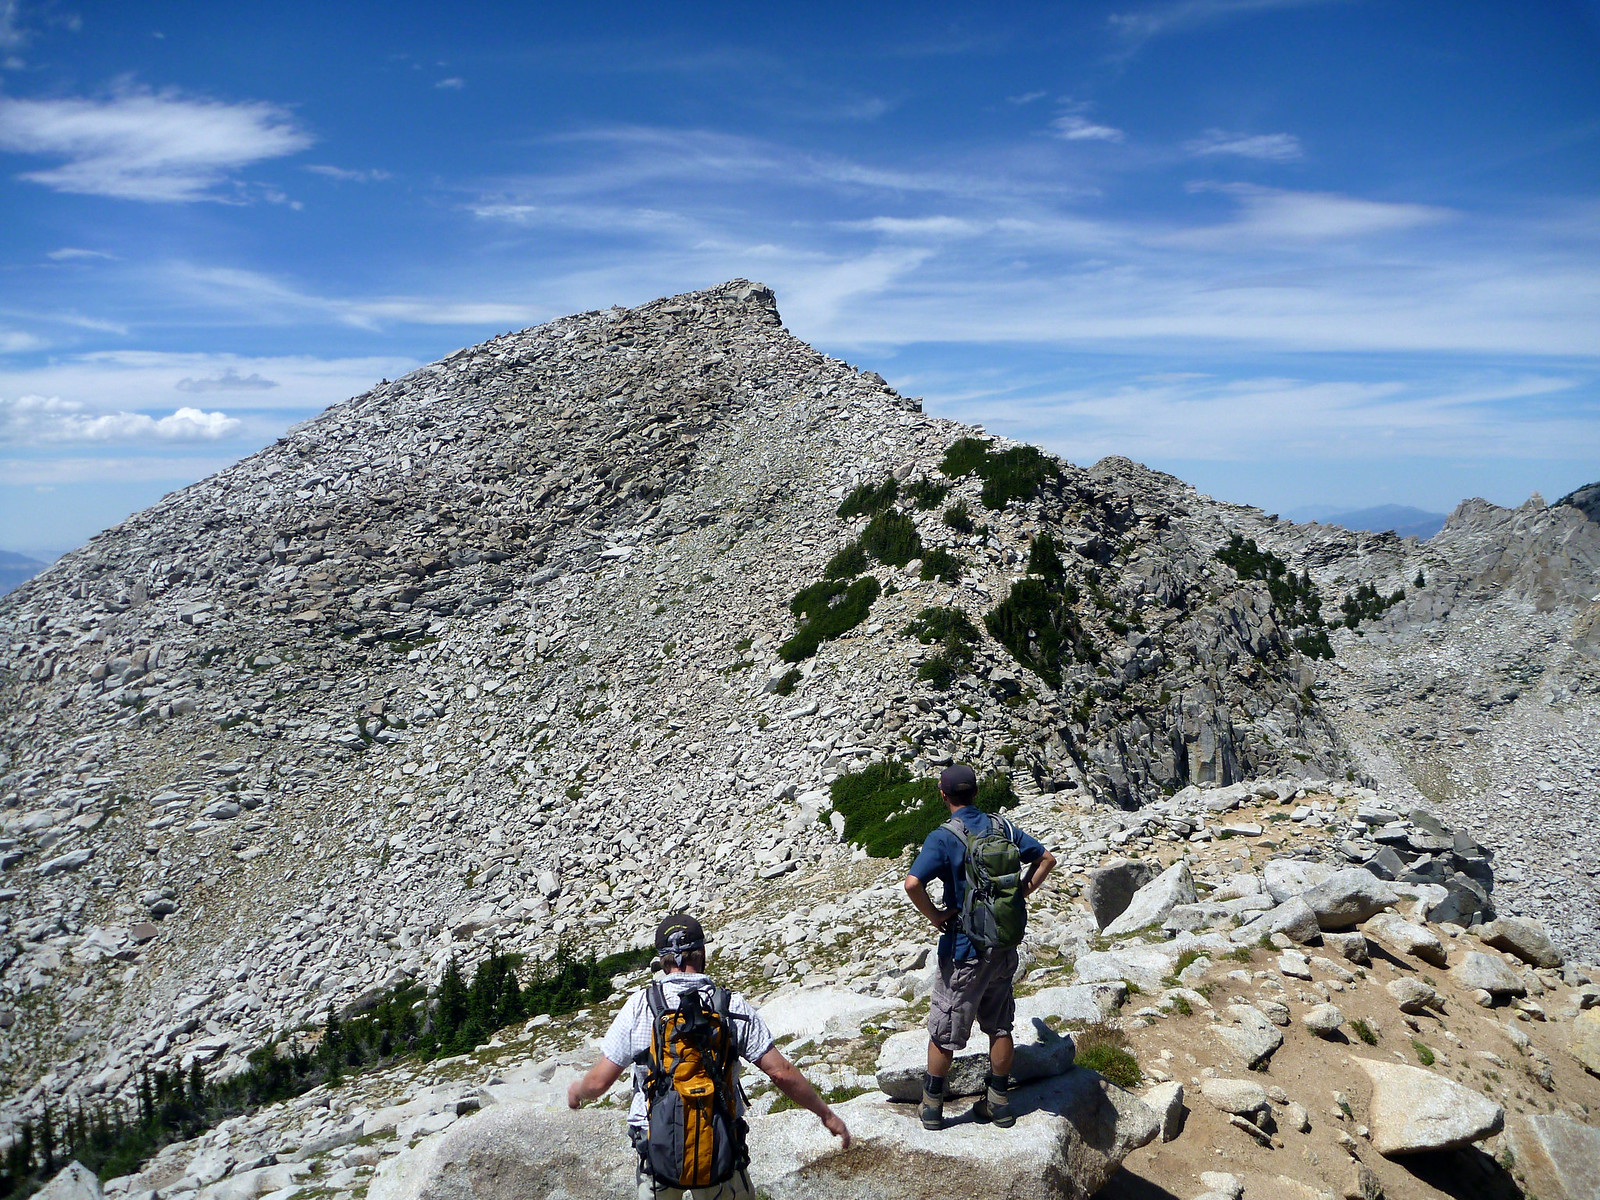
Adult goatGoat familyHow do I get down?Jumping downSouth Thunder mountain
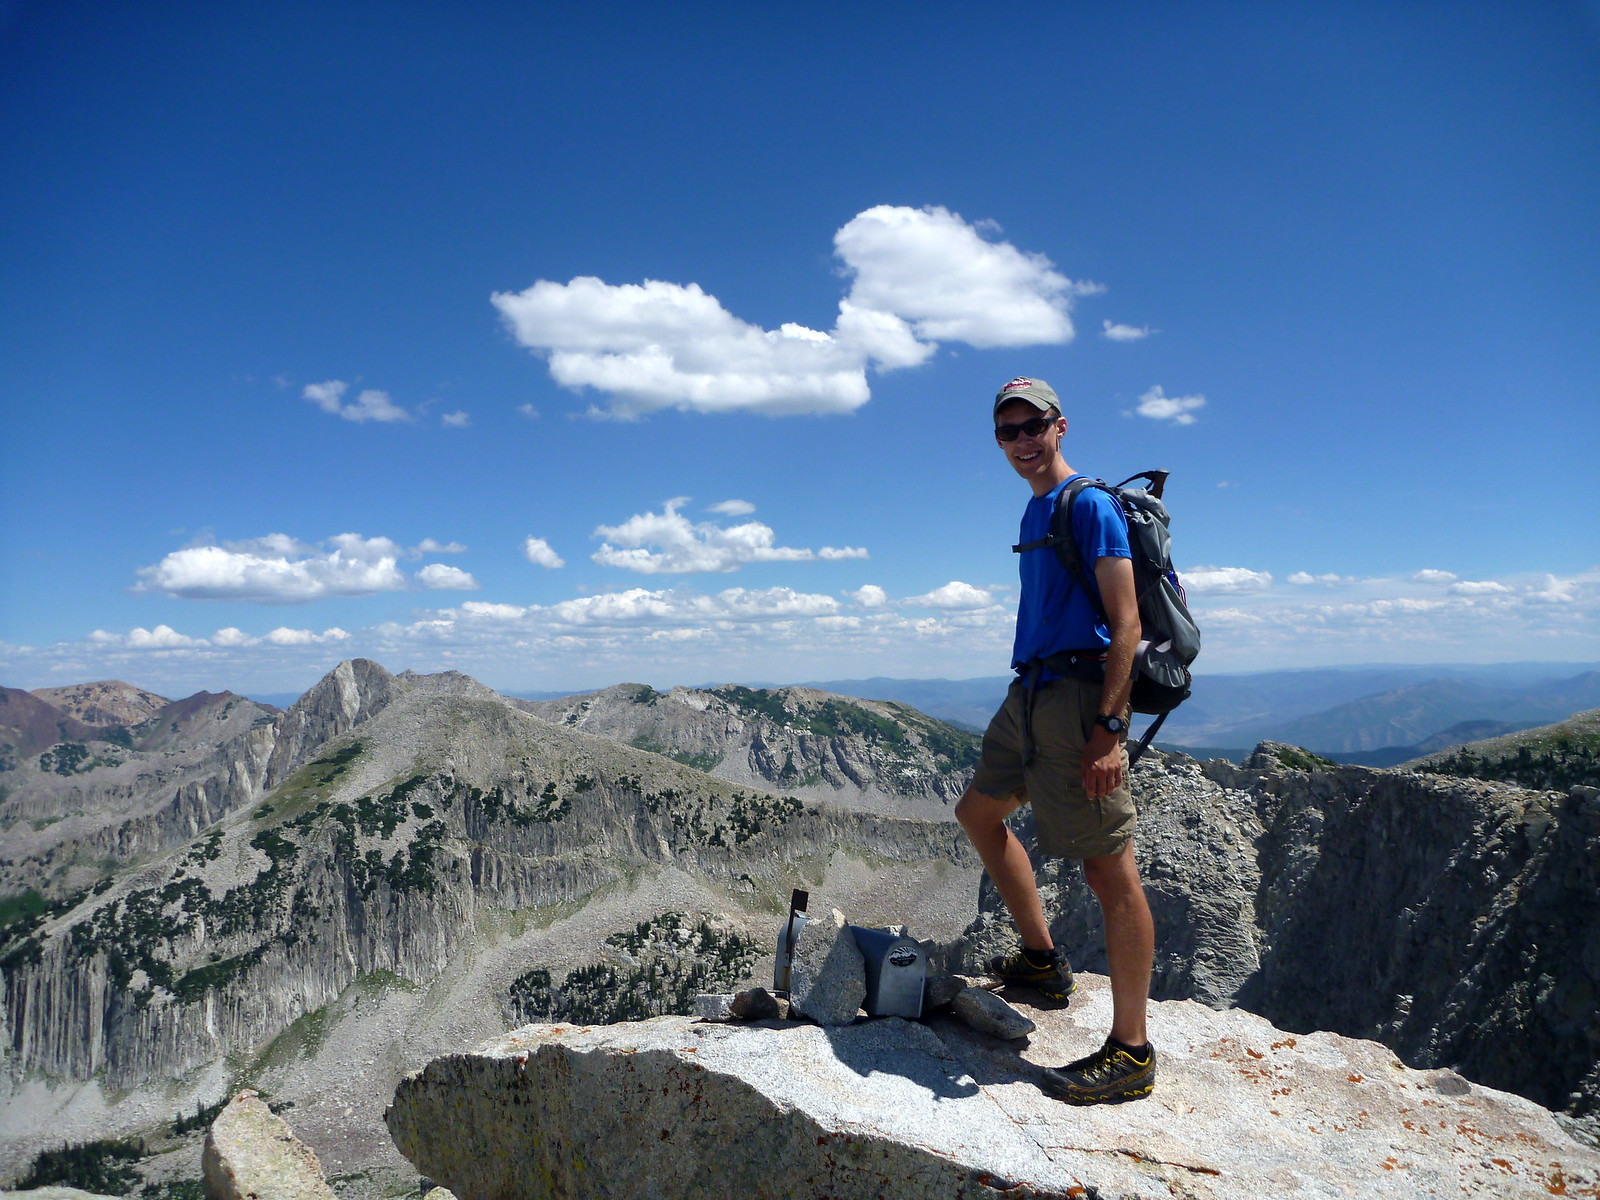
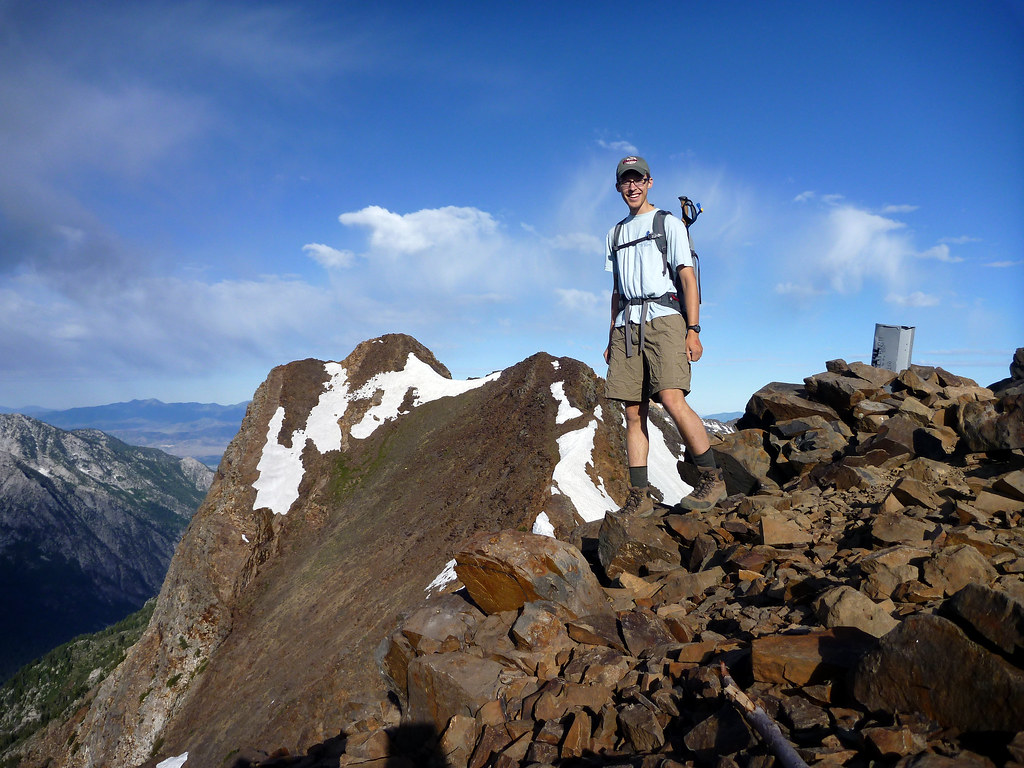
We walked the remaining few hundred feet up to the summit of South Thunder. It was cool to revisit this peak as my last Wasatch hike – it was also my first!
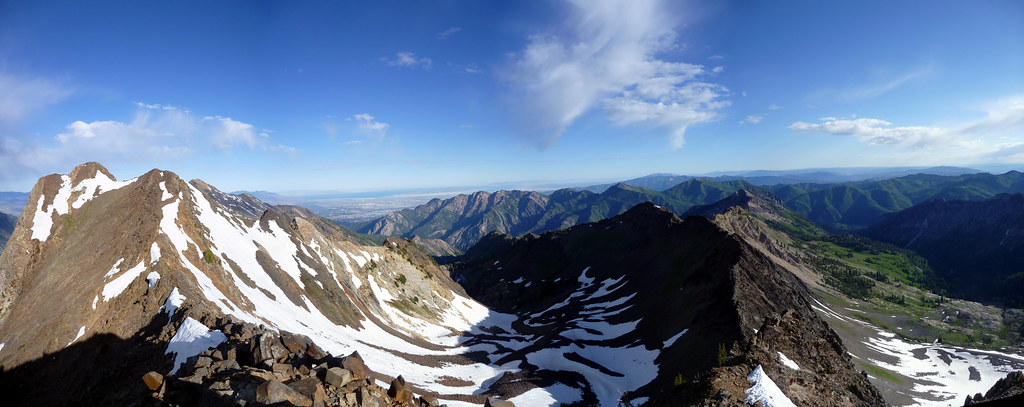
South Thunder take 2South Thunder pano (click to expand)East Face of Lone PeakDescending South Thunder
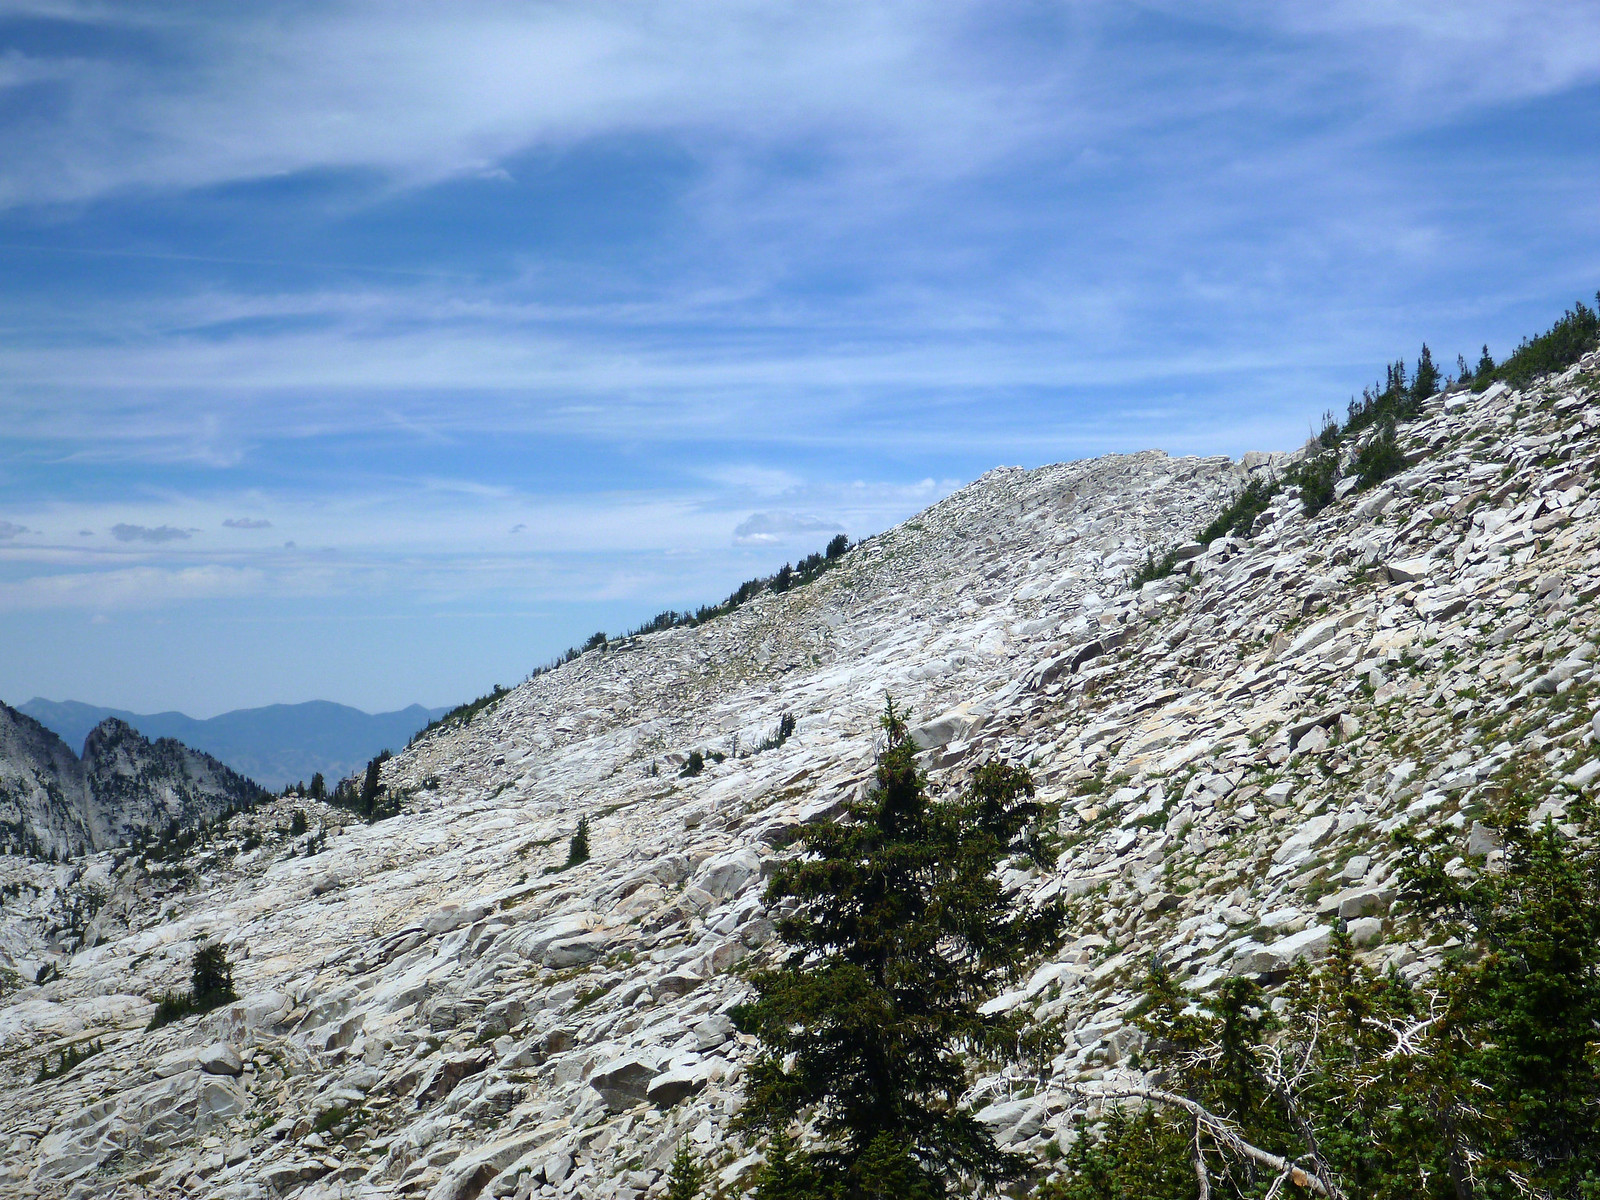
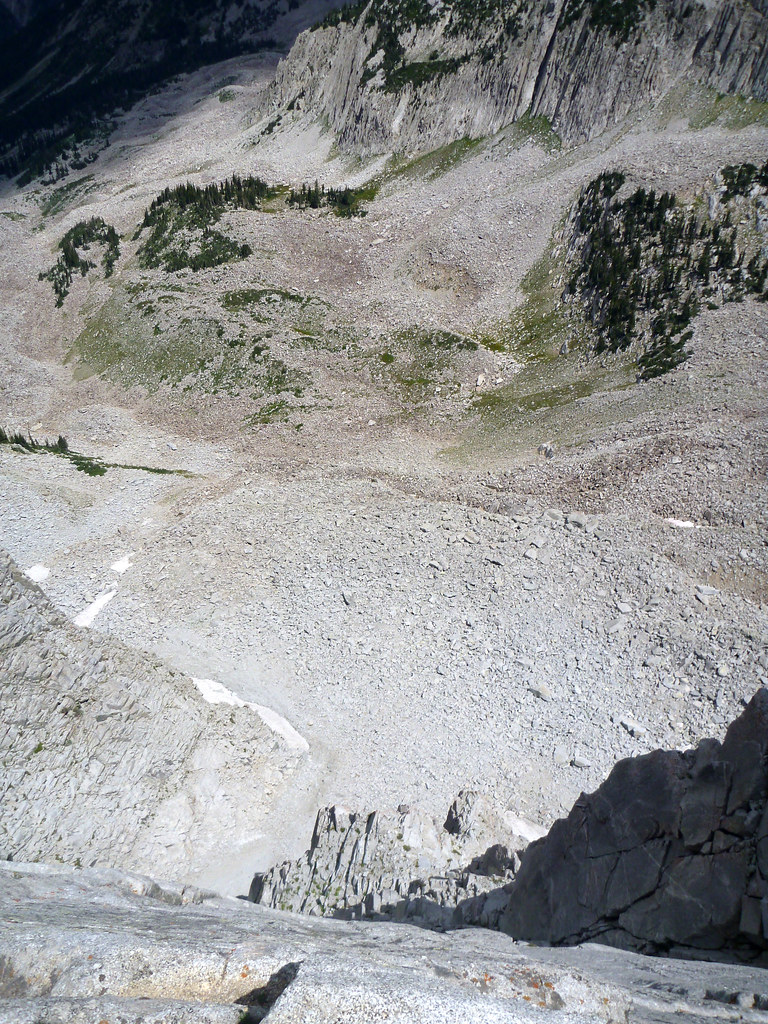
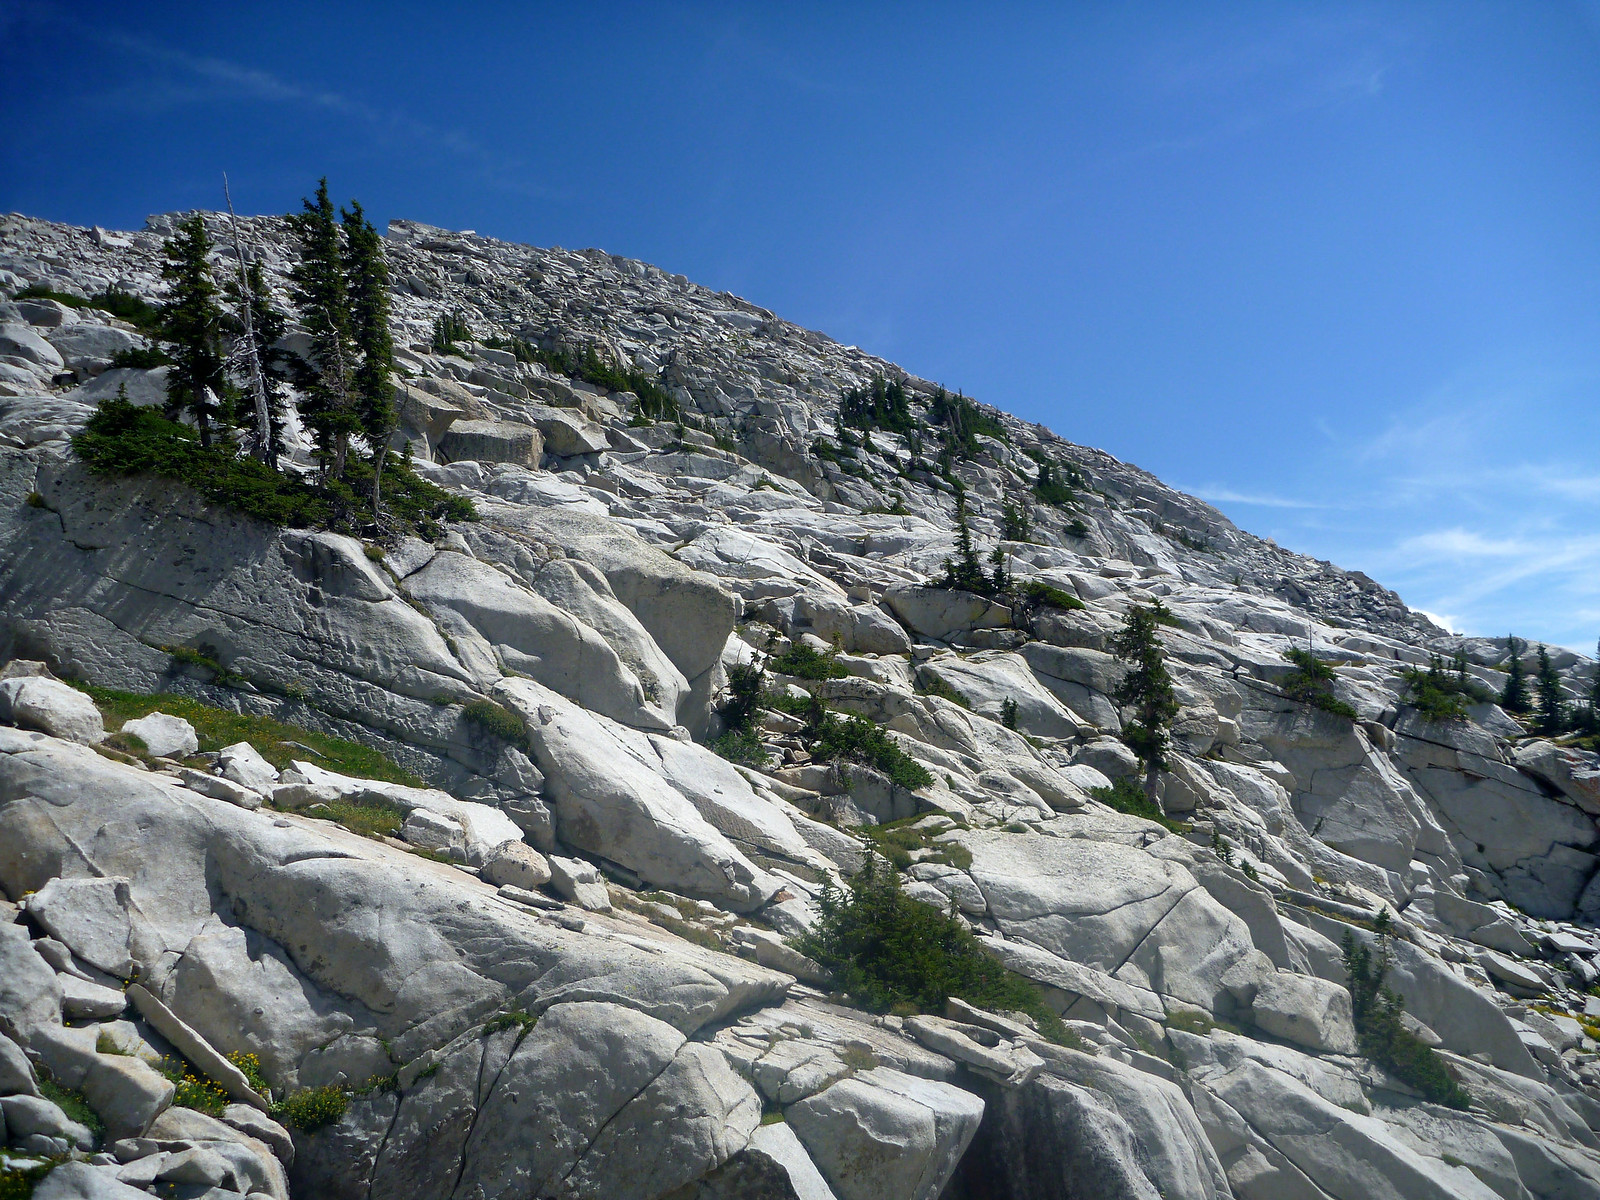
At this point, we began the descent and I was starting to get tired. It was a couple thousand feet of granite slabs to the grassy field above the reservoir, then a bit of a bushwhack down to the reservoir itself.
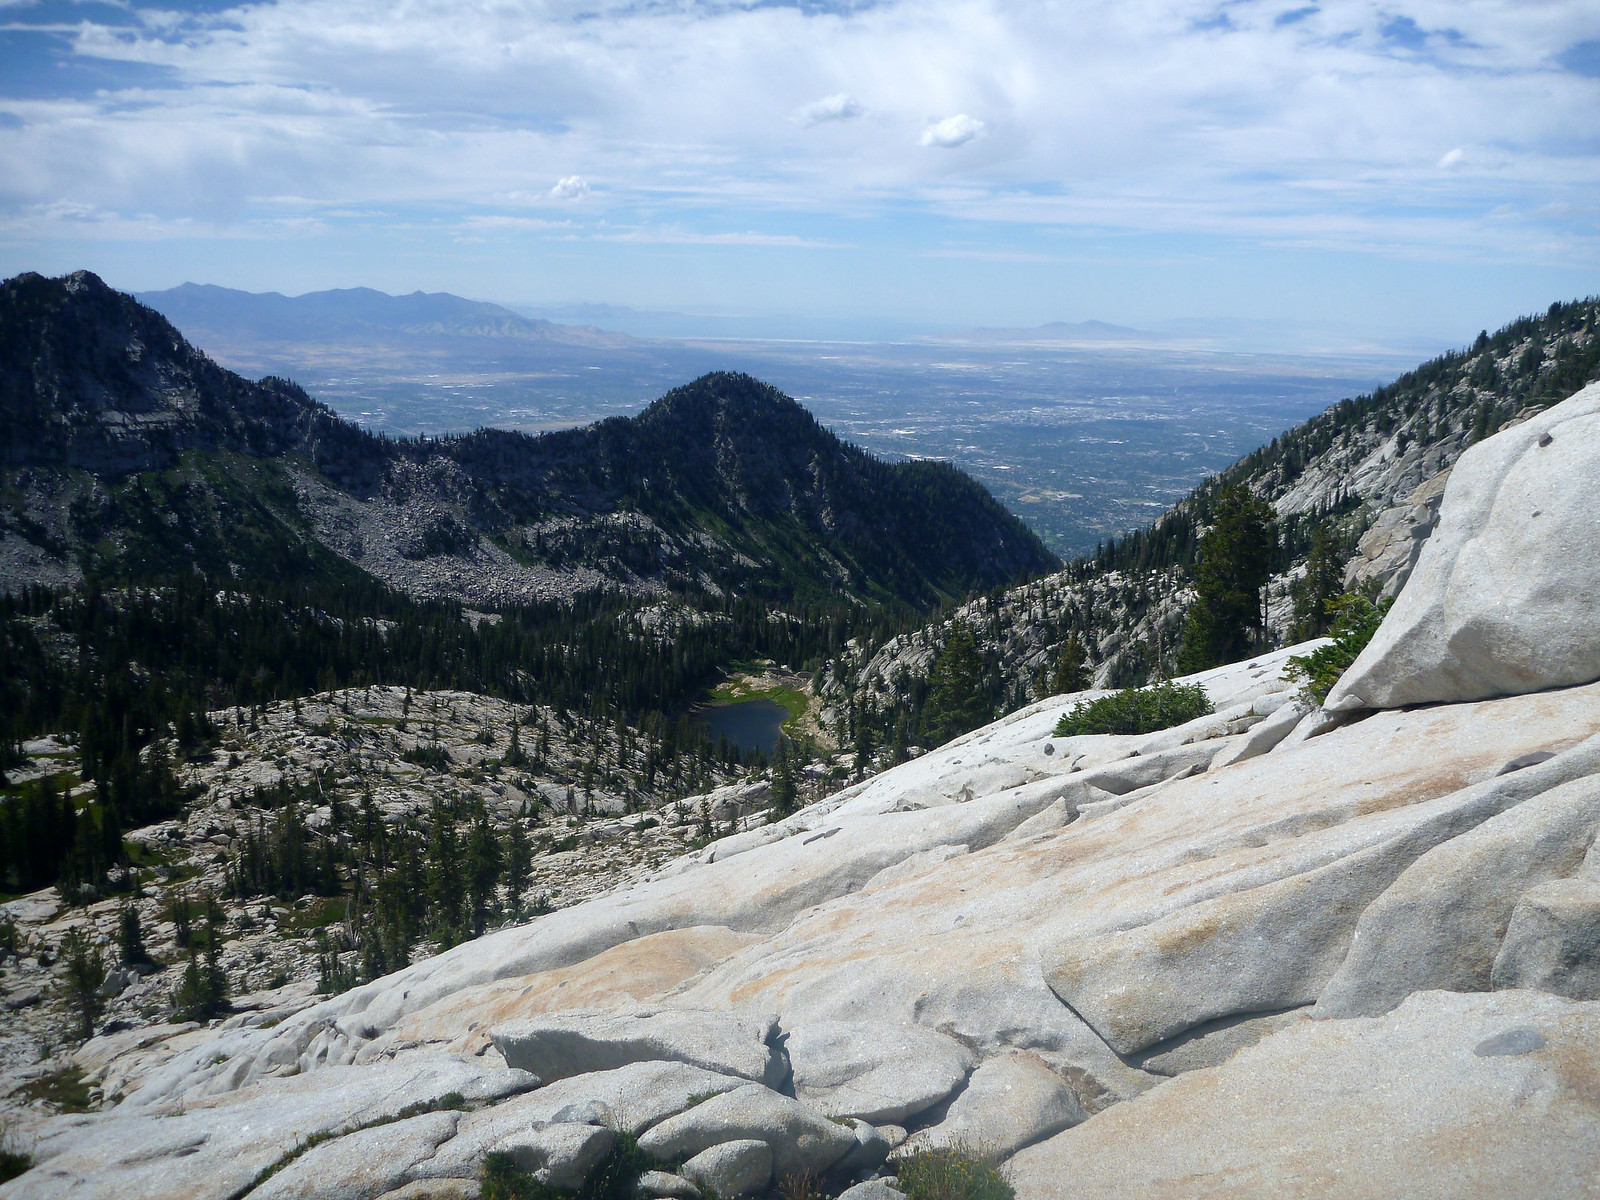
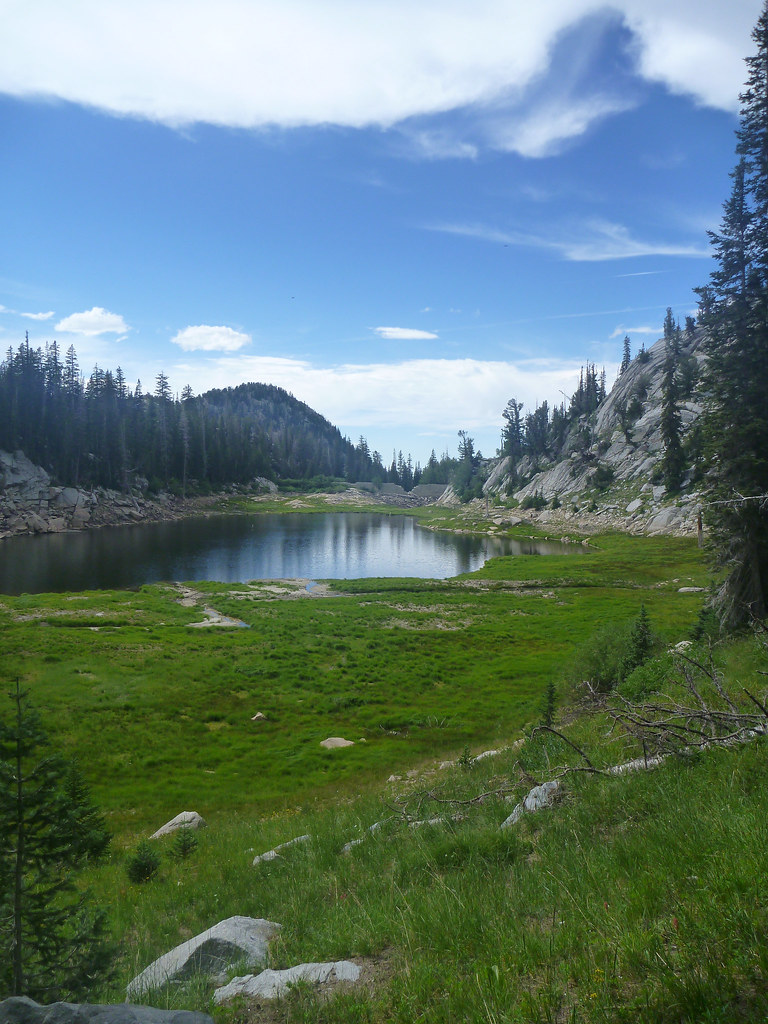
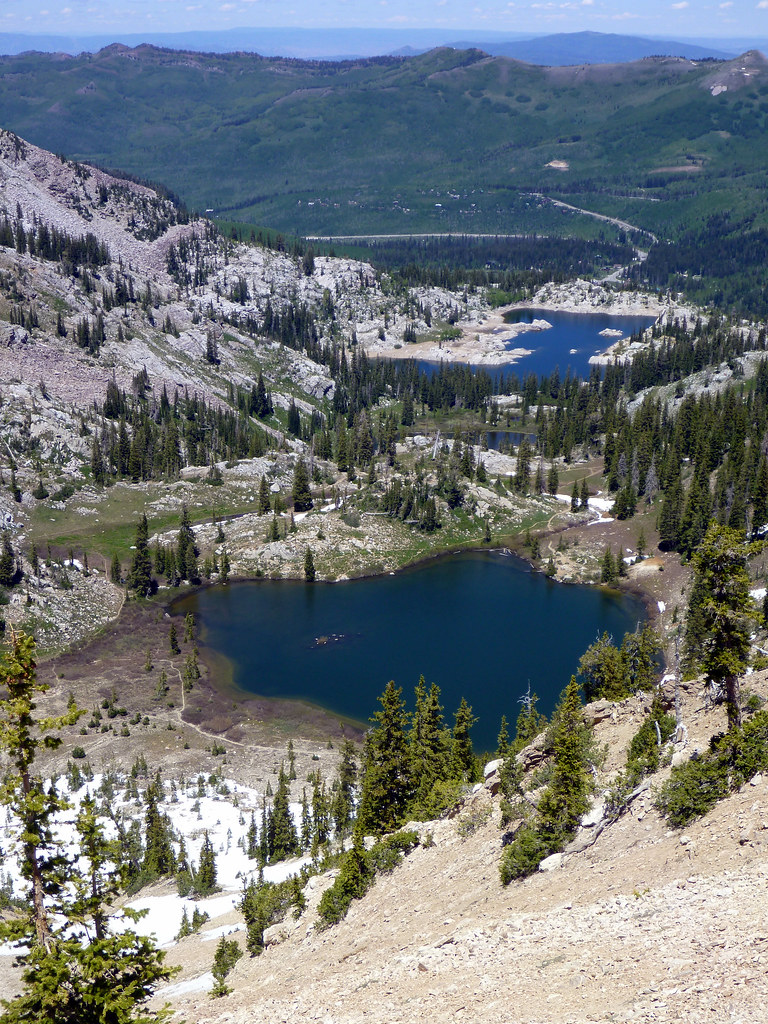
View of the reservoir from up highHanging valley above the reservoirUpper Bell’s reservoir
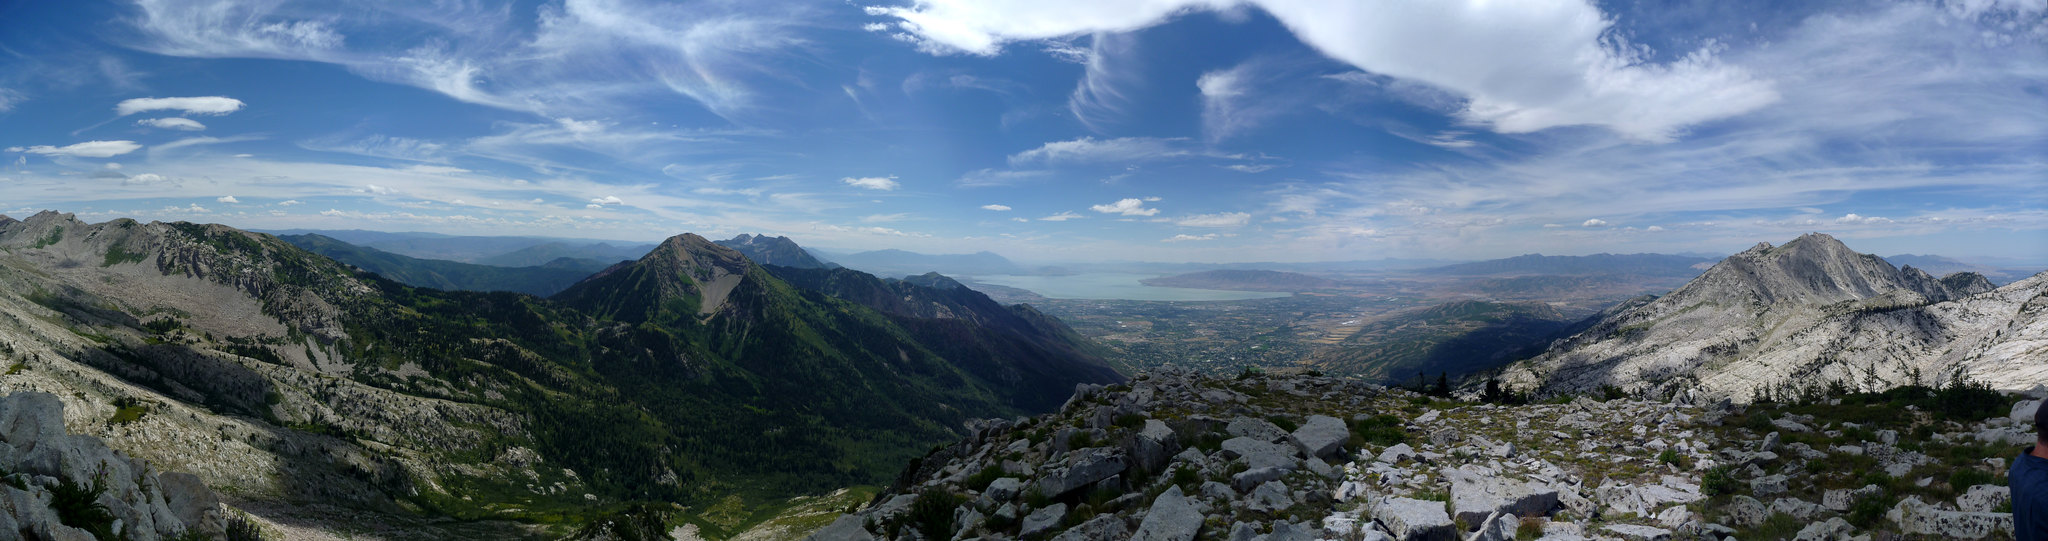
After reaching the reservoir I thought I was home free. Ohhhh no. There are still 4-5 miles and thousands of feet of elevation left to lose all the way down to the car. Never has the valley looked so close yet been so far away…
Upper Bell’s Falls
Maybe 1/3 of the way down the trail we side-hiked to the upper falls which were nice. I was pretty beat though so I was ready to head all the way down. The trail is steep and rocky – wouldn’t be a problem but after 11 hours of hiking it was pretty brutal.
We arrived back at the car at around 7:00 – just under 12 hours car-to-car. Not a fast pace, but we got down before dark which is all I was looking for.
This Saturday, I wanted to hike something where lots of people would be around, since my usual hiking buddy had other plans and I would be flying solo. I settled for heading up LCC to Alta, where I figured lots of hikers would be taking advantage of the perfect weather. I ended up summitting 5 named peaks over 10,000′, including one more off the Wasatch 11’ers list.
Mt. Superior / Monte Cristo Peak
Mt. Superior – 11,040′
Monte Cristo Peak – 11,132′
4 miles
Vertical gain: 2700′
3:58 car-to-car including about an hour of summit lounging
Monte Cristo Peak rises tall above Snowbird ski resort, and its sub-peak Mt. Superior (without enough prominence to count in the 11’ers list) is impressive looking from Alta. Some people climb the south ridge of Mt. Superior as a technical climb, which looks like a blast. Today I tackled the normal hiking route.
I started from the trailhead just past “Our Lady of the Snows” church and headed up to Cardiff Pass, which I had visited about a month earlier. I reached the pass in about 45 minutes and continued west along the use trail.
Sunrise in Little CottonwoodMeadow below Cardiff Pass (taken on descent)Climber’s trail up the East ridge of Mt. Superior
There were great views along the entire ridge run, in particular, to the North looking into Big Cottonwood Canyon. This is a big area for backcountry skiing because of the steep but not cliffy terrain.
Looking north from a dip in the ridge route
After a while, the trail got steeper. There were a couple Class 3 spots but the moves were secure and the exposure to the south can be largely avoided if you stay on route.
Weaving through the quartzite ridge
Some rock on the ridge can be a bit loose but in general it is pretty good if you pay attention.
Secure, fun scrambling
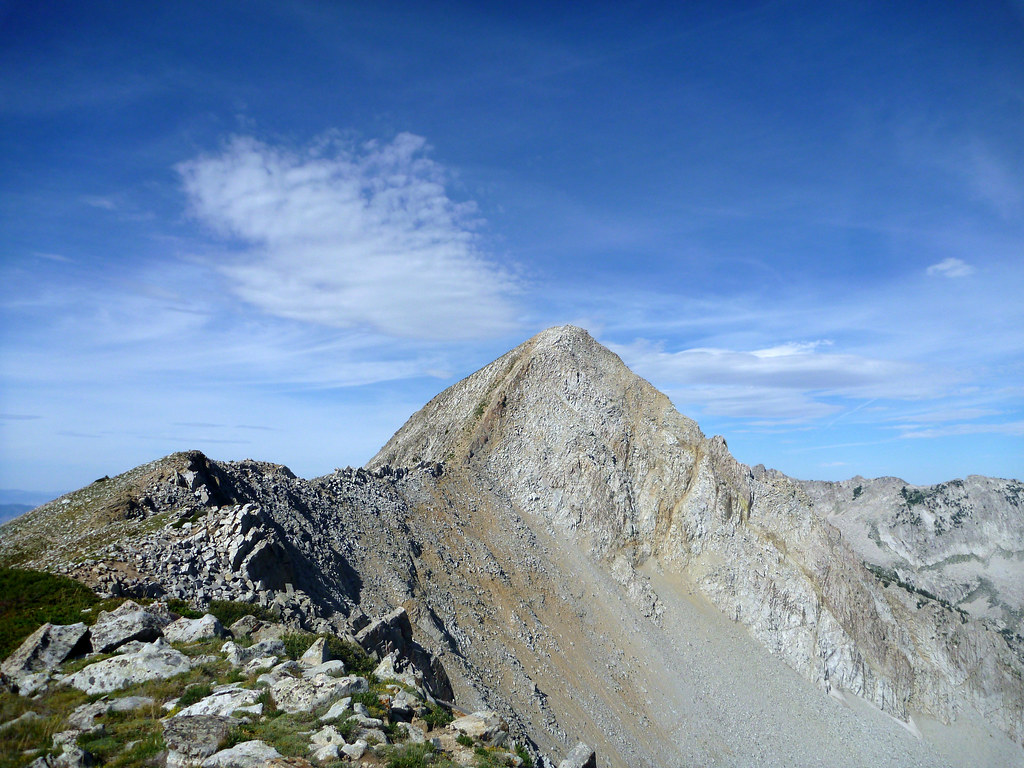
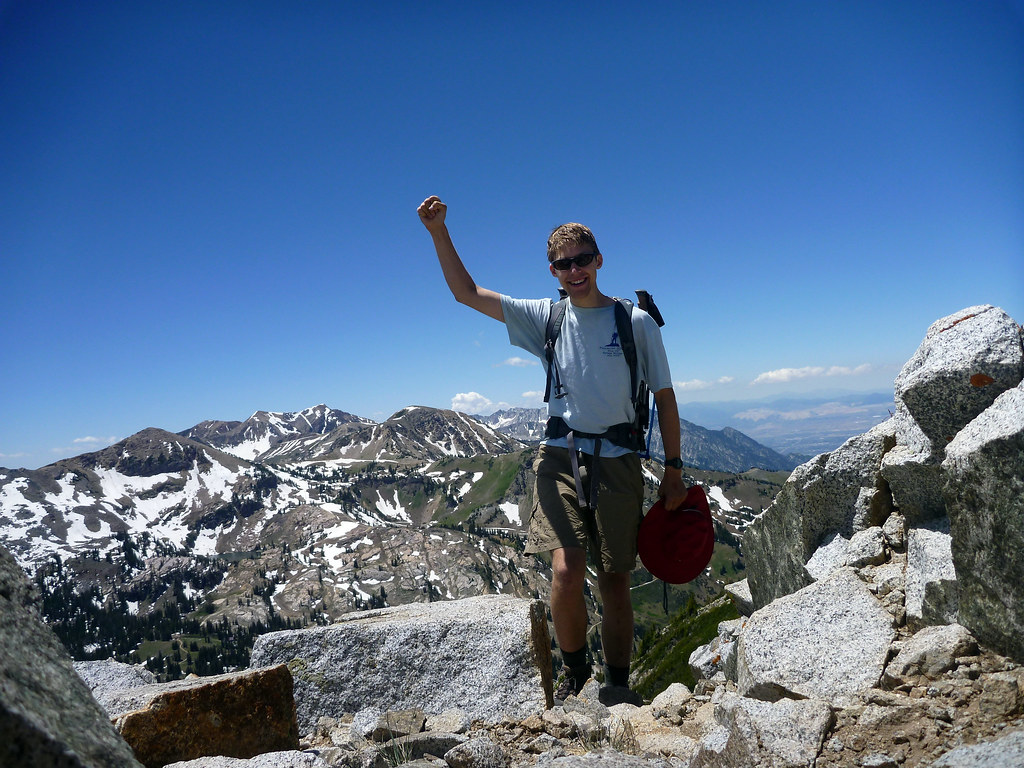
After just an hour and a half, I was on top of Mt. Superior! I took a couple shots, then took off down the ridge since I planned on eating breakfast on top of Monte Cristo, the real high point.
Summit shot on Mt. Superior with Monte Cristo behindSpectacular view to the northwest.Easy Class 2 ridge to Monte Cristo
Getting to Monte Cristo took 10 minutes or so. It’s a walk. Breakfast time!
Awkward Monte Cristo selfie. Now 1/3 done with the Eleveners!Best view yet of Great Salt LakeWide pano looking South from Monte Cristo (click to enlarge)Triple Traverse – Sunrise, Dromedary, Broad Fork Twins
I chilled on the summit for quite a while and wanted to check whether my emergency phone would actually work, so I called up my dad and said hello. The views from the top were among the best I’ve seen since I have been in Utah, which is saying something. I think hands-down this is the coolest view of the lake (over the top of Mt. Olympus and the Wildcat Ridge). The sun was rising, it was a bit chilly, and I was loving all of it.
Eventually I finished my food and turned back. The scramble down was easier since the trail was easier to find.
Looking back at Mt. Superior. The snow was not a problem.Cardiac Ridge (Superior’s N Ridge)
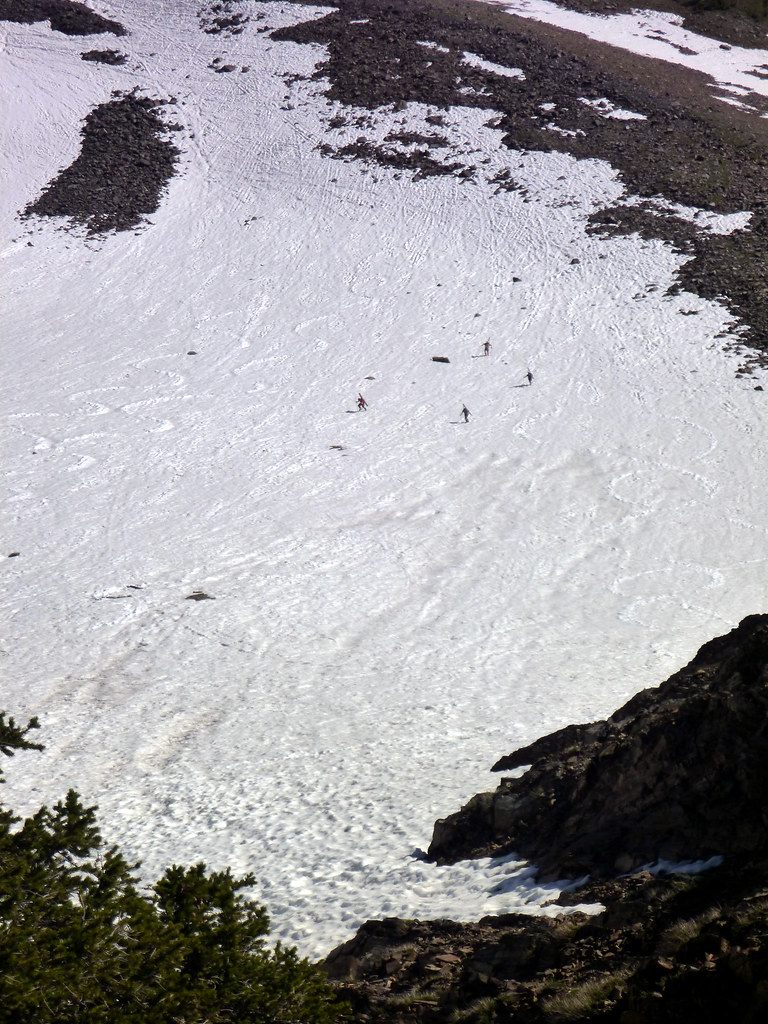
I am not sure why, but skiers were all over the place today. More power to them.
Skiers scrounging the last bits of snow for the year in Cardiac Bowl
On the way back to Cardiff Pass, I took a right turn instead of a left and ended up a few hundred yards southwest of the pass on steep but manageable scree slopes. If you hate loose rock and sidehilling (I hate both of those things) make sure you do not repeat this.
I like the colors in this one. Approaching the last ridge before Cardiff Pass
By this time it was only about 10:15. What to do now? I looked at my map, and noticed how close I was to Mt. Wolverine… and being a Michigan alum, the opportunity was too much to ignore. I used the Twin Lakes Pass route, which starts at the same trailhead as Cardiff Pass but heads east instead of northwest, along a nicely graded Jeep trail. I cruised the 3 miles to the pass in about an hour, stopping to chat with a fellow hiker, Greg? who suggested that I make a loop out of it by traversing over the top of Mt. Wolverine and descending the Albion Pass road into the Alta ski area. That sounded good to me!
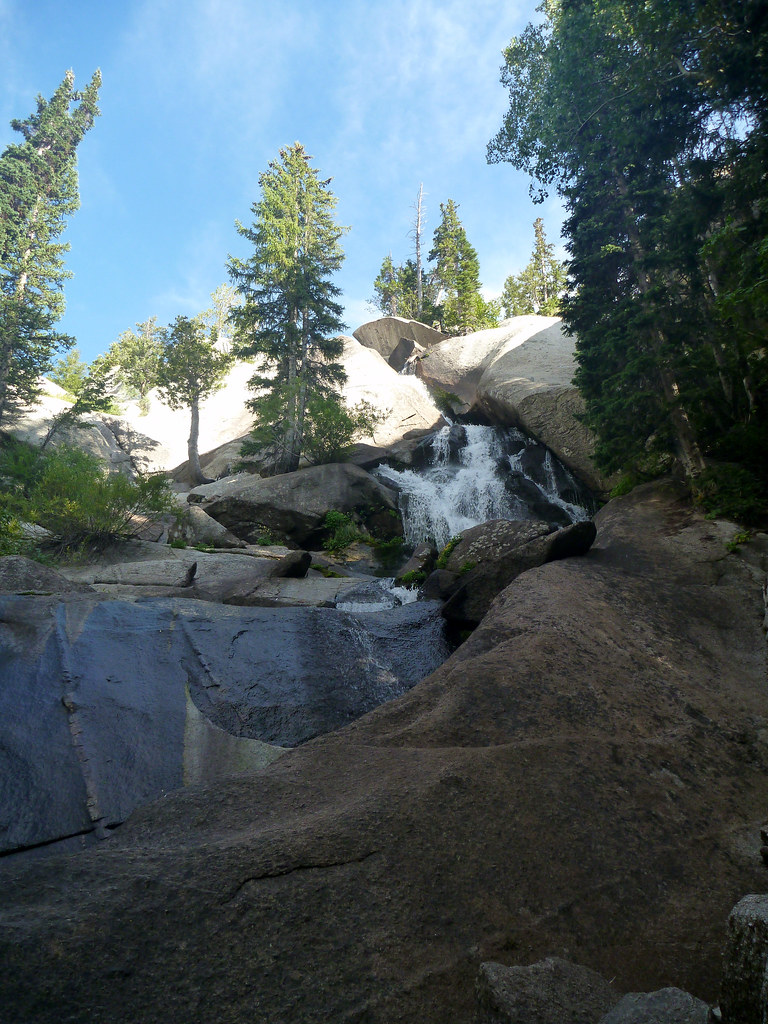
Water cascaded over this flat granite formation – it reminded me of the water feature in the Detroit airport
The route to the top of Mt. Wolverine is an obvious use trail through the boulder field above Twin Lakes Pass – you can’t miss it.
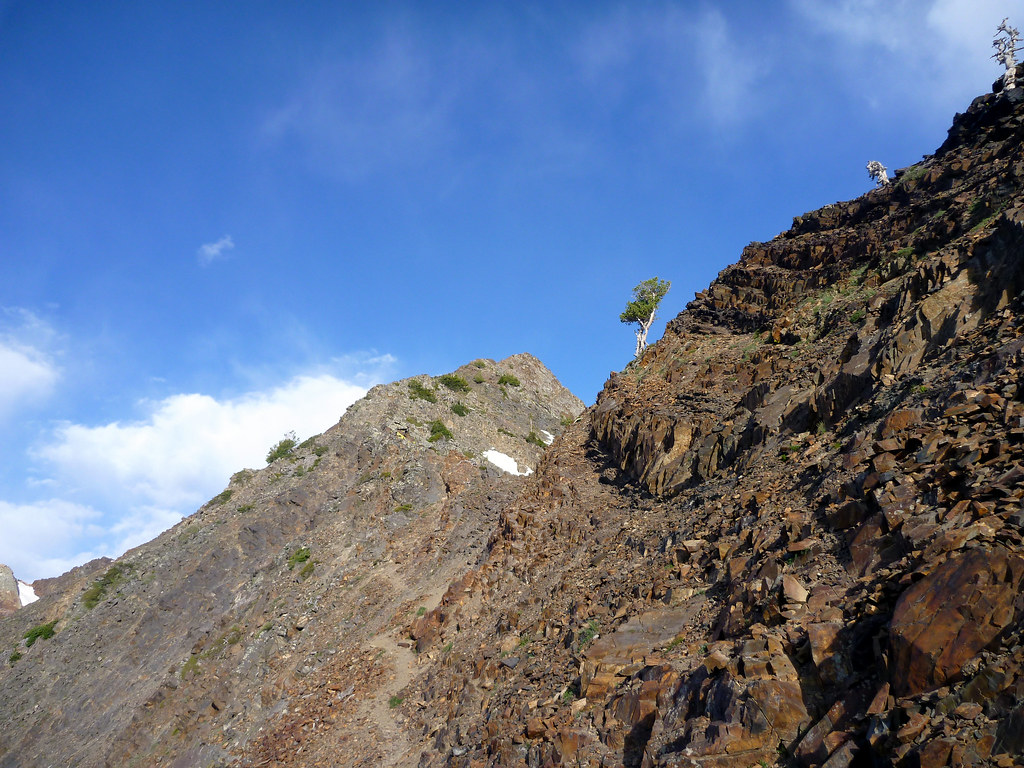
Mt. Wolverine’s north ridge
At the top of the ridge is a small false-summit, called “Patsy Marley Peak” by the skiers, which provides a great view of the rest of the Wolverine ridge.
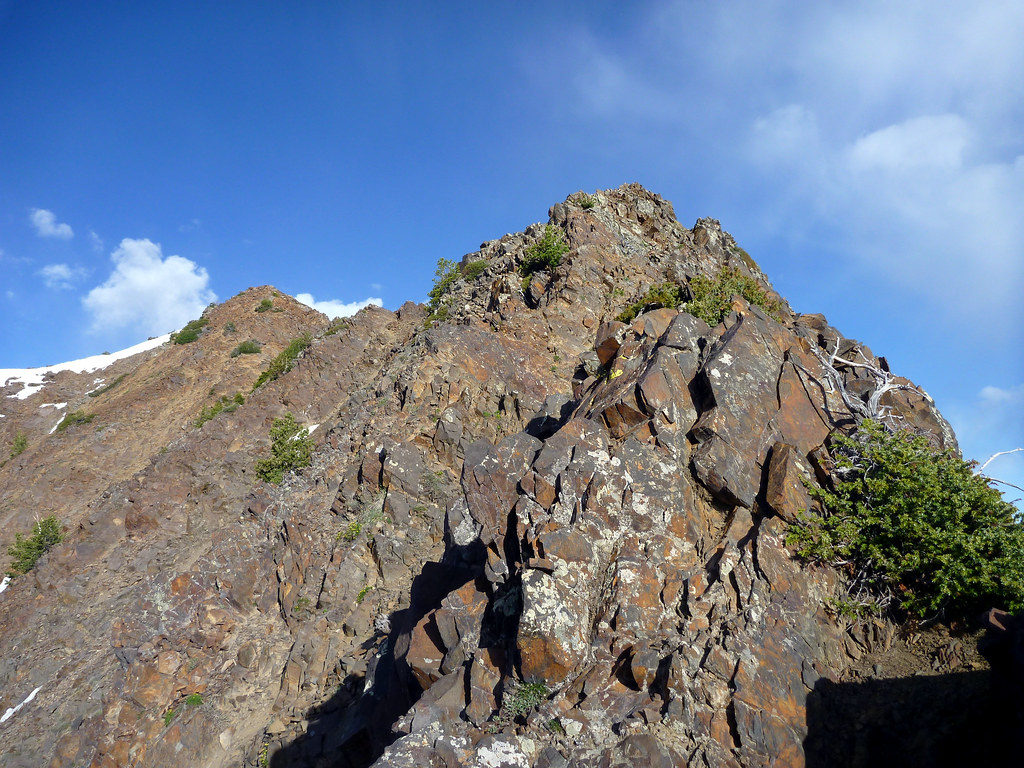
Mt. Wolverine summit ridge from the north
There is an impressive cirque (bowl) beneath Mt. Wolverine which avalanches repeatedly each winter.
Admittedly, I wouldn’t have gone out of my way to climb this one except for the Michigan connection, but the cool part about the summit view is that you are looking straight down Little Cottonwood towards Salt Lake City. There is also a nice set of rocks on the summit that make a nice wind shelter. I laid in the sun for about half an hour eating a sandwich and warming up before continuing along the ridge.
Summit view from WolverineHail! from the summit of Mt. Wolverine
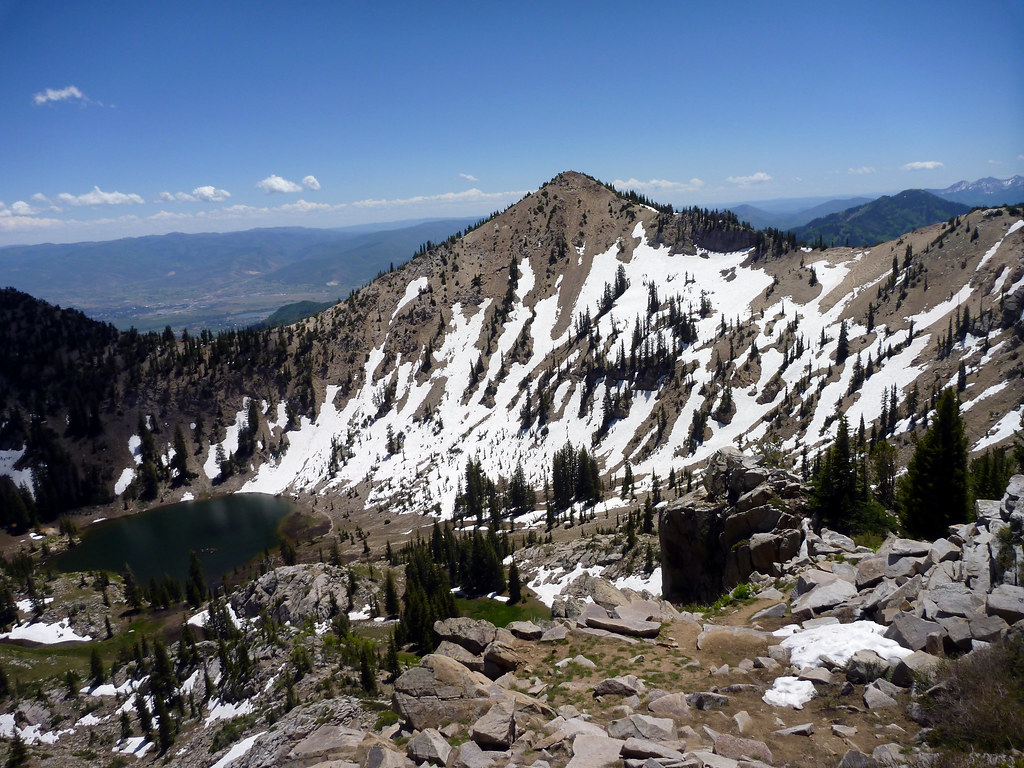
Next on the agenda was Mt. Tuscarora, which is a minor bump on the ridge south to Catherine Pass. Unremarkable except for a nice view of Sunset Peak, the final objective for the day.
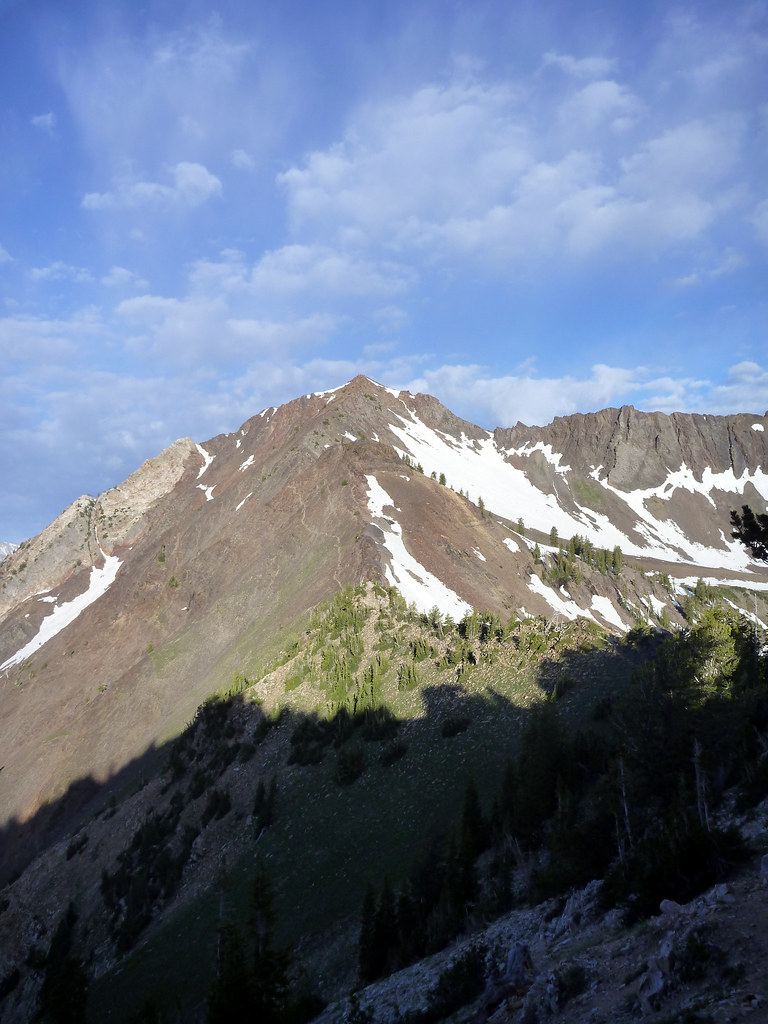
Sunset Peak from Tuscarora
I reached the pass about 15 minutes after leaving the top of Mt. Wolverine, and immediately climbed up the other side the 300′ required to reach the top of Sunset Peak. This is one of the most accessible peaks in the Wasatch, with a maintained trail and not much elevation gain from the Albion Basin summer road.
Mt. Wolverine and Mt. Tuscarora from Sunset Peak
Sunset Peak was packed full of hikers but had some good views. Prepare for some big panoramas.
Northwest View. Mt. Superior in the middle, Mt. Wolverine at the right. It looks like a long day from this perspective!Mega panorama (click to enlarge). Mt. Timpanogos to the south at the left, then the Bullion Divide peaks of Sugarloaf, Mt. Baldy, and the American Fork Twins. Mt. Superior is center-right to the NorthwestSouthern view towards TimpanogosSome nice lakes / reservoirs below
Another cool thing about Sunset Peak is that it sits on the divide of Alta Ski Resort in Little Cottonwood, and Brighton in Big Cottonwood, and you can get to it from either side or do the traverse.
I descended quickly from Sunset Peak back to Catherine Pass, then headed back to the car via Albion Basin, an alpine meadow above Alta Ski Resort. I’m glad I made a loop of the trip because this is definitely a more scenic route than the way I ascended.
Mt. Superior and the Twins from Albion BasinPicnic spot? Albion BasinThe ridge to the southwest from Albion
The other nice thing about Albion Basin is that once the summer road opens (July 4 or so) you can drive a normal car up very high and avoid a lot of the elevation gain. I saw lots of families on this section of the hike.
Back to reality
I was trying to beat 4 hours for the loop, so I booked it down the ski hill, avoiding the long road walk in favor of some moderate ski runs which made a fine trail. There is sort of a gorge you need to avoid by heading right and picking up the snowcat track near the maintenance lot at the bottom. Walked about 1/4 mile along the pavement back to my car, and the day was done. 5 named peaks over 10,000′, and a great hike through some beautiful scenery.